> ## Documentation Index
> Fetch the complete documentation index at: https://docs.routera.io/llms.txt
> Use this file to discover all available pages before exploring further.
# Managing data fields
> Create and configure custom fields for Contacts, Companies, Deals, and Tickets.
Data fields define what you store on each object type. Routera includes standard fields per type; you can add custom fields for routing, reporting, and integrations.
**Object types:** Contacts, Companies, Deals, Tickets
**Field types:** Single-line text, Number, Single checkbox, Dropdown, Date, User
If HubSpot is connected, creating a **User** field also creates an owner field in HubSpot. See [Integrate HubSpot](/kb/integrate-hubspot).
## Create a field
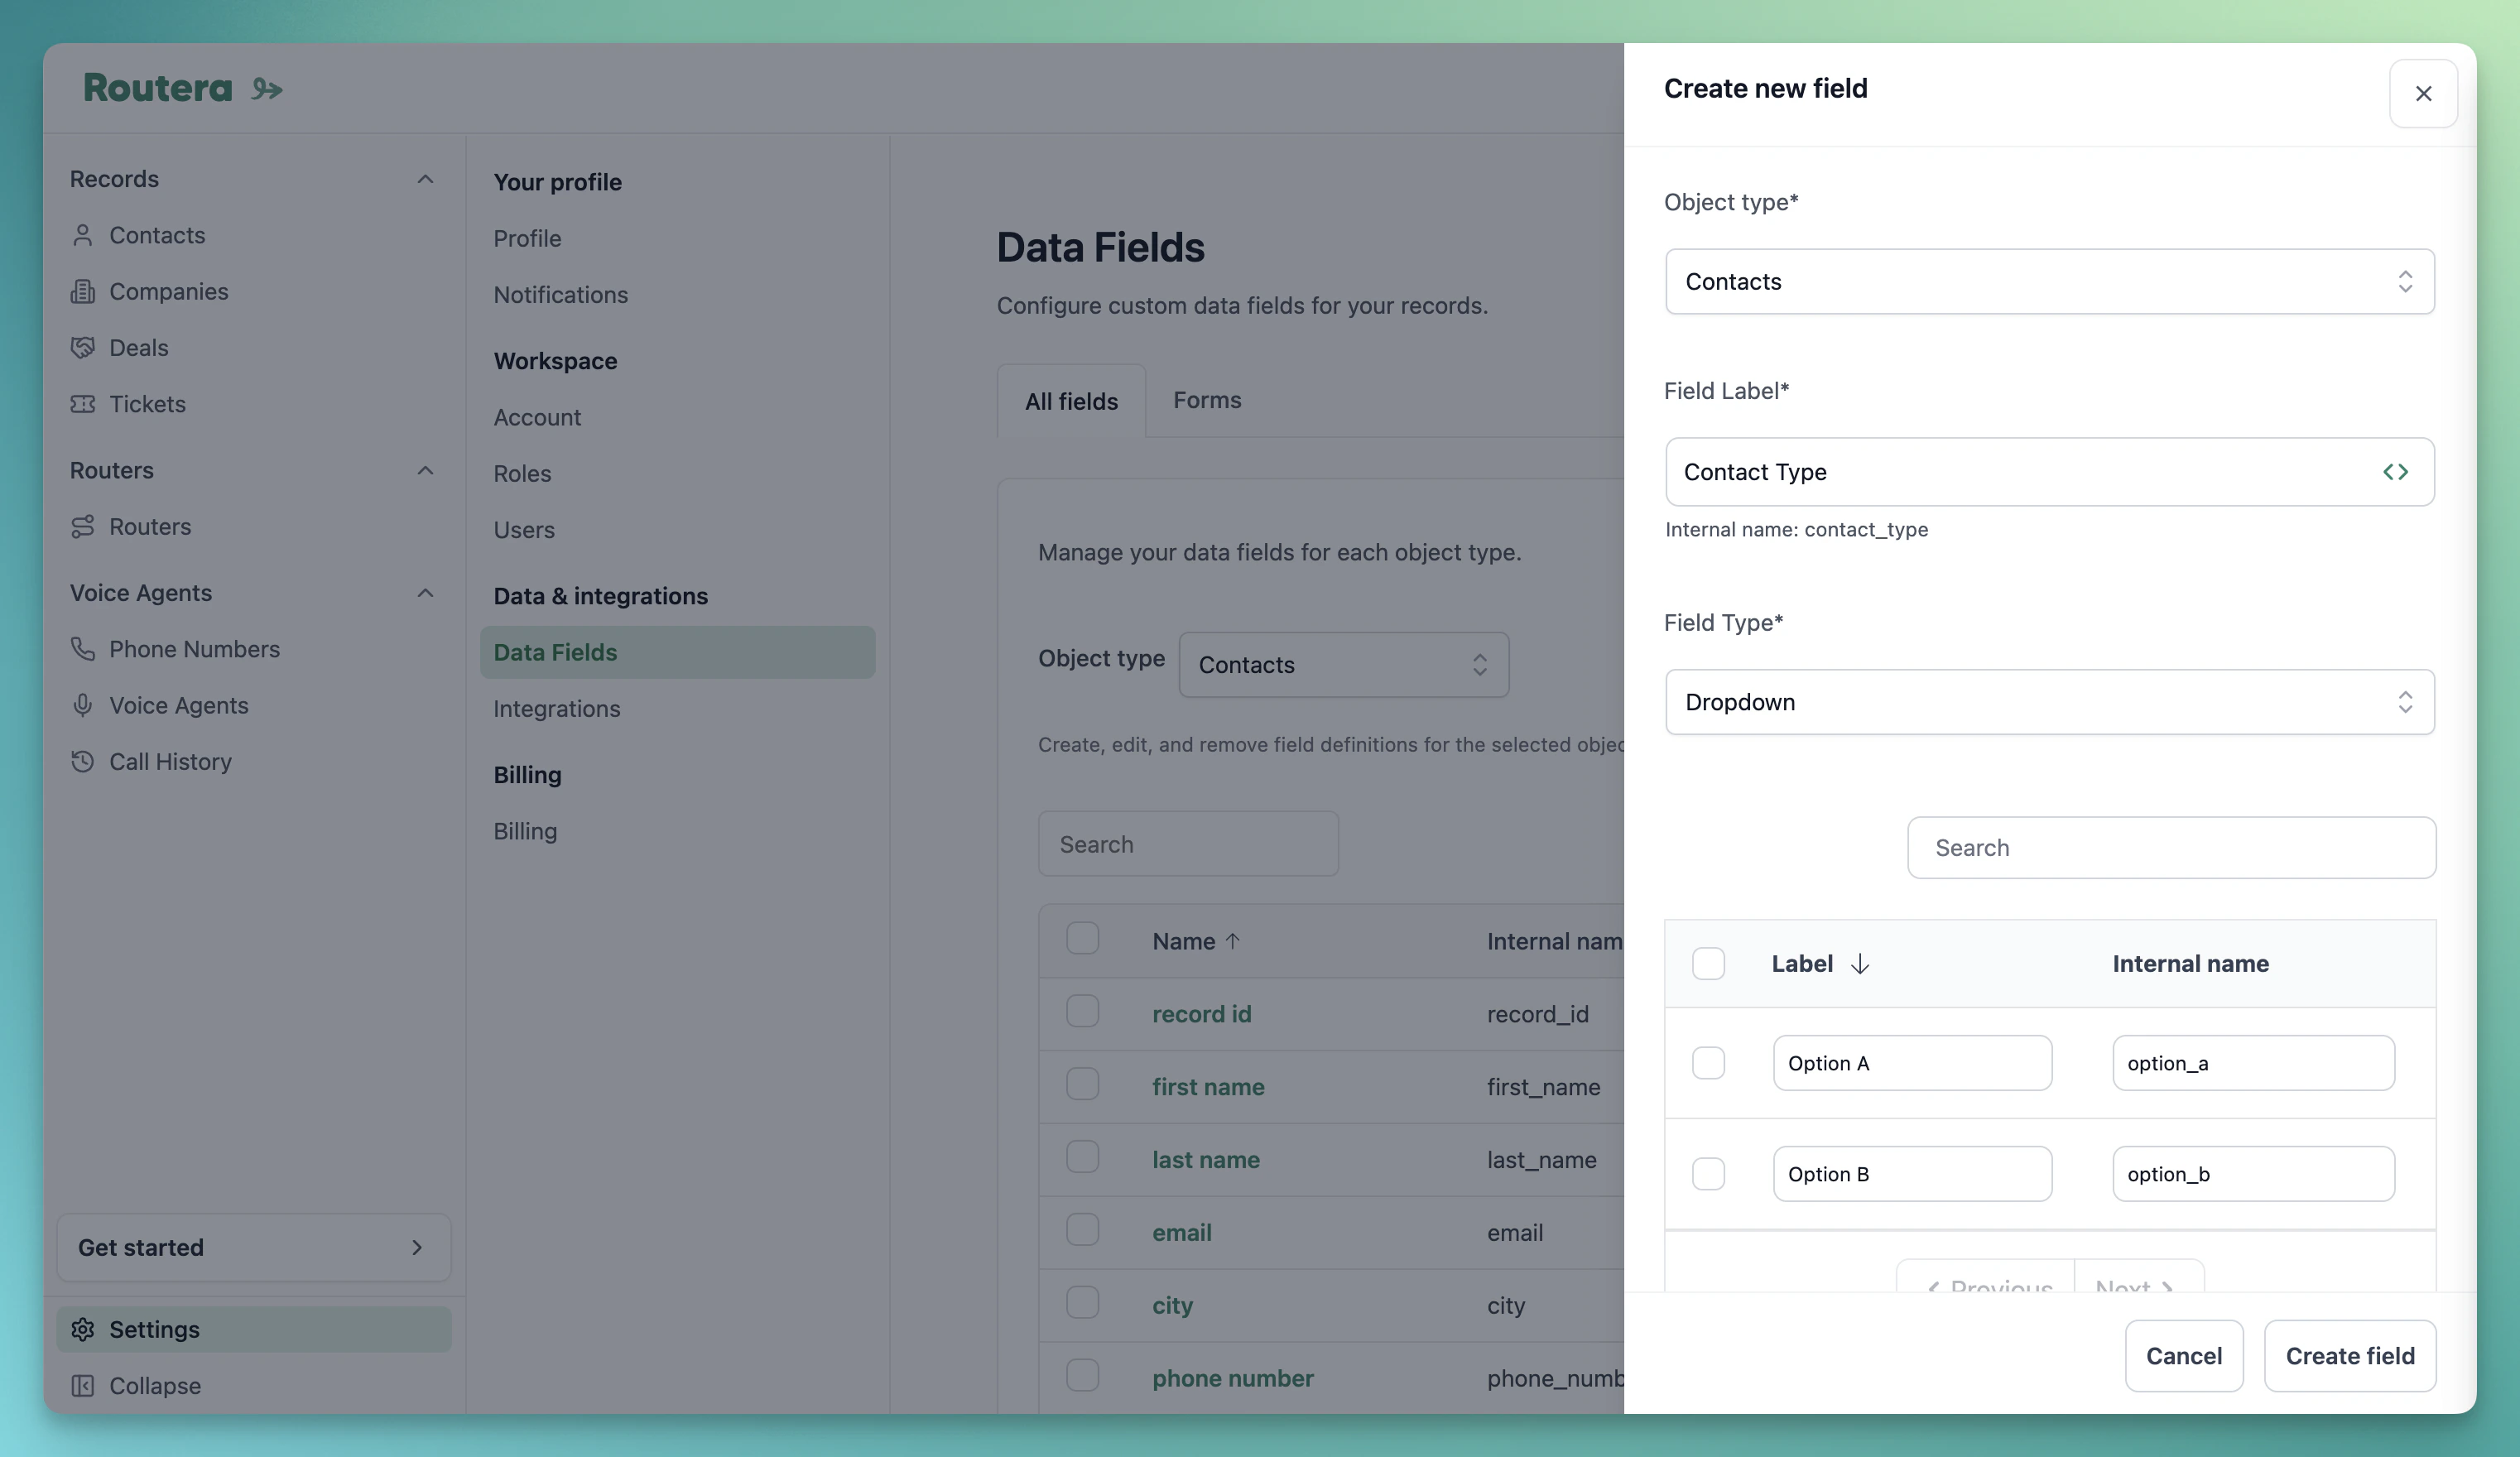
1. Open **Settings** → **Data Fields** on the **All fields** tab.
2. Choose an **object type**, then click **Create Field**.
3. Enter a **field label** and confirm the **internal name** (auto-generated from the label; you can adjust it).
4. Select a **field type**. For **Dropdown**, add at least one option with a label and internal name.
5. Click **Create field**.
 ## Edit a field
1. On **Data Fields**, select the object type.
2. Click the field name to open its details.
3. Update the label, options (for dropdowns), or other settings, then click **Update field**.
Default system fields may have limited editing.
## Delete a field
1. Select the object type and select the field in the list.
2. Delete the field and confirm.
Removing a field affects records and any routers or capacities that reference it.
## Record create / edit forms
Field definitions live under **All fields**; the **Forms** tab controls the drawer people see when they [create or update a record](/kb/create-records) from the records list—not which columns appear in the table (use **Edit columns** on the records page for that).
1. Open **Settings** → **Data Fields** and switch to the **Forms** tab.
2. Select an **object type** (Contacts, Companies, Deals, or Tickets).
3. For each eligible field, configure:
* **Create** — show on the new-record drawer.
* **Update** — show when editing an existing record.
* **Required** — must be filled before save.
* **Min length** / **Max length** — optional, for single-line text fields only.
4. Drag the handle on a row to change field order in the drawer.
5. Click **Save form settings**.
## Edit a field
1. On **Data Fields**, select the object type.
2. Click the field name to open its details.
3. Update the label, options (for dropdowns), or other settings, then click **Update field**.
Default system fields may have limited editing.
## Delete a field
1. Select the object type and select the field in the list.
2. Delete the field and confirm.
Removing a field affects records and any routers or capacities that reference it.
## Record create / edit forms
Field definitions live under **All fields**; the **Forms** tab controls the drawer people see when they [create or update a record](/kb/create-records) from the records list—not which columns appear in the table (use **Edit columns** on the records page for that).
1. Open **Settings** → **Data Fields** and switch to the **Forms** tab.
2. Select an **object type** (Contacts, Companies, Deals, or Tickets).
3. For each eligible field, configure:
* **Create** — show on the new-record drawer.
* **Update** — show when editing an existing record.
* **Required** — must be filled before save.
* **Min length** / **Max length** — optional, for single-line text fields only.
4. Drag the handle on a row to change field order in the drawer.
5. Click **Save form settings**.
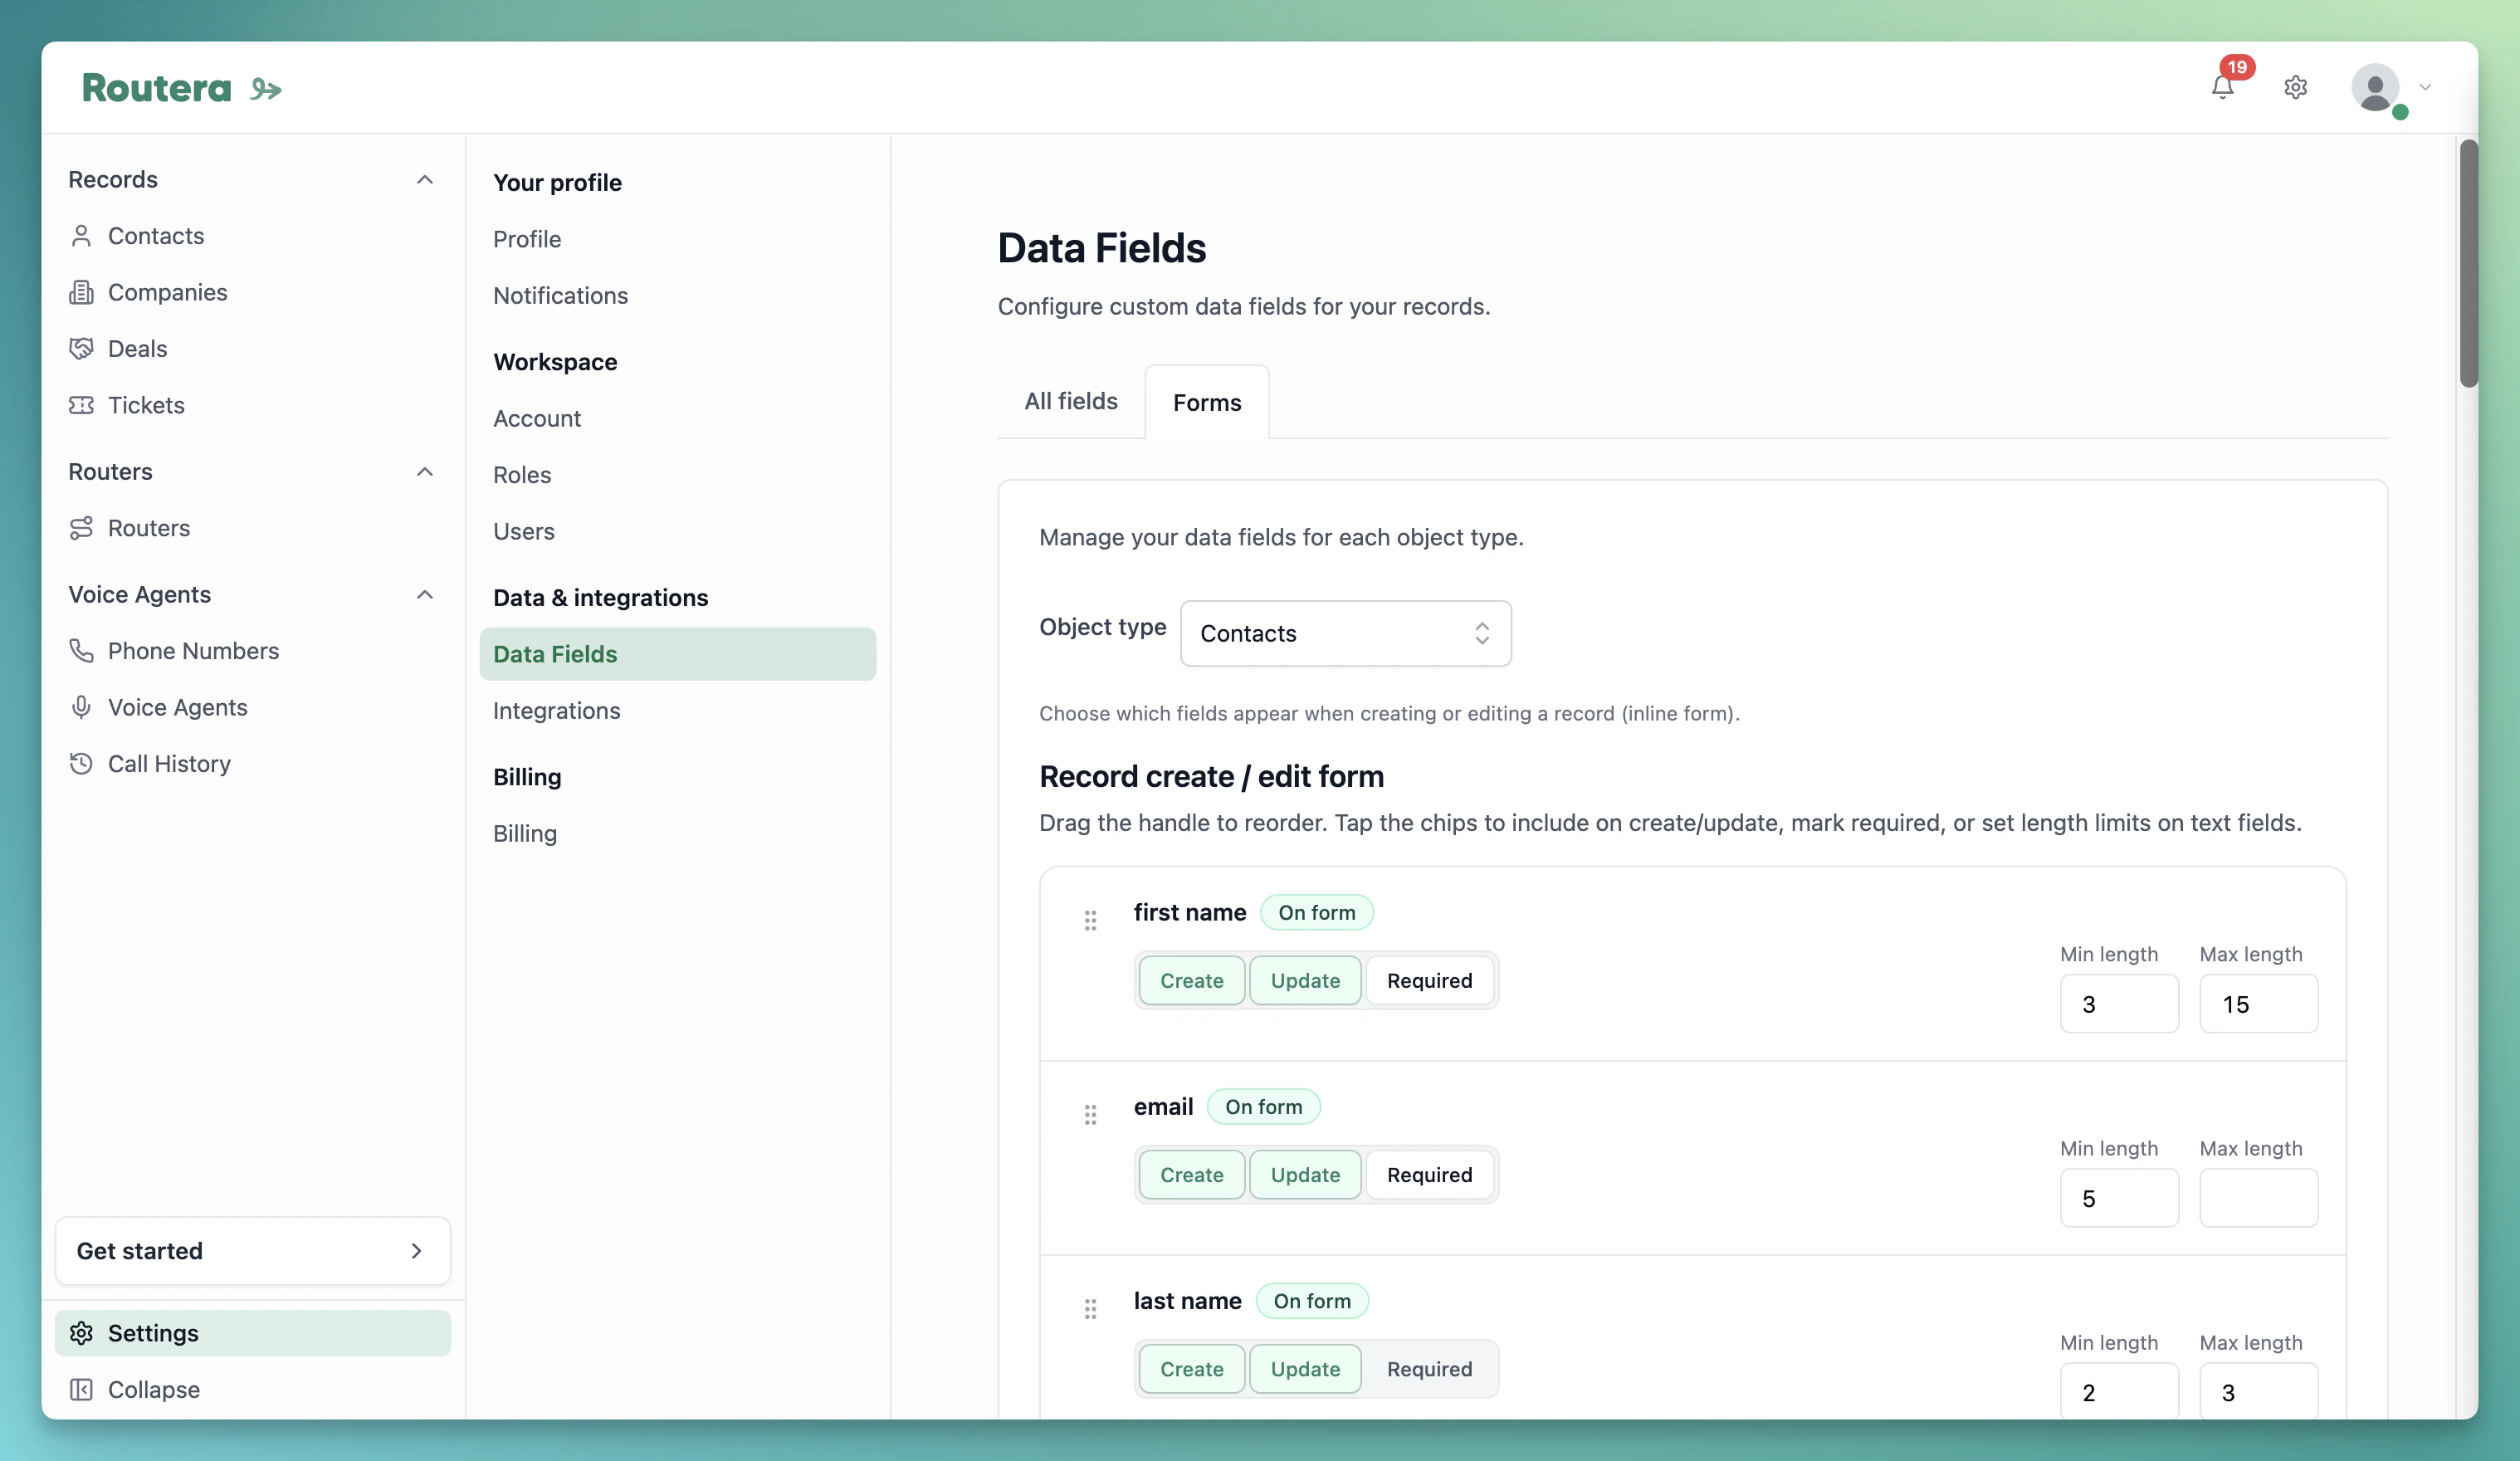 A field can be on the form for create only, update only, or both. Rows marked **Hidden from form** stay in your data model but do not appear in the drawer until you enable **Create** or **Update**.
System fields such as record ID and audit dates are not configurable here. Supported types for the drawer match what you can add as fields: text, number, date, dropdown, user, and checkbox.
Changes apply per object type. After you add a new custom field under **All fields**, return to **Forms** if you want it on the create or edit drawer.
Custom fields also appear in filters, routers, and capacities once defined. See [Managing records](/kb/create-records) for day-to-day record work.
A field can be on the form for create only, update only, or both. Rows marked **Hidden from form** stay in your data model but do not appear in the drawer until you enable **Create** or **Update**.
System fields such as record ID and audit dates are not configurable here. Supported types for the drawer match what you can add as fields: text, number, date, dropdown, user, and checkbox.
Changes apply per object type. After you add a new custom field under **All fields**, return to **Forms** if you want it on the create or edit drawer.
Custom fields also appear in filters, routers, and capacities once defined. See [Managing records](/kb/create-records) for day-to-day record work.