> ## Documentation Index
> Fetch the complete documentation index at: https://docs.routera.io/llms.txt
> Use this file to discover all available pages before exploring further.
# Upgrade your plan
> Choose a paid plan, add a payment method, and manage billing in Settings.
Upgrading unlocks higher assignment limits, more seats, and paid features such as phone numbers and branded calling. Billing is managed per workspace under **Settings** → **Billing**.
You need permission to update **Billing** in your role. If you do not see these options, ask a workspace admin.
## Choose a plan
1. Open **Settings** → **Billing**.
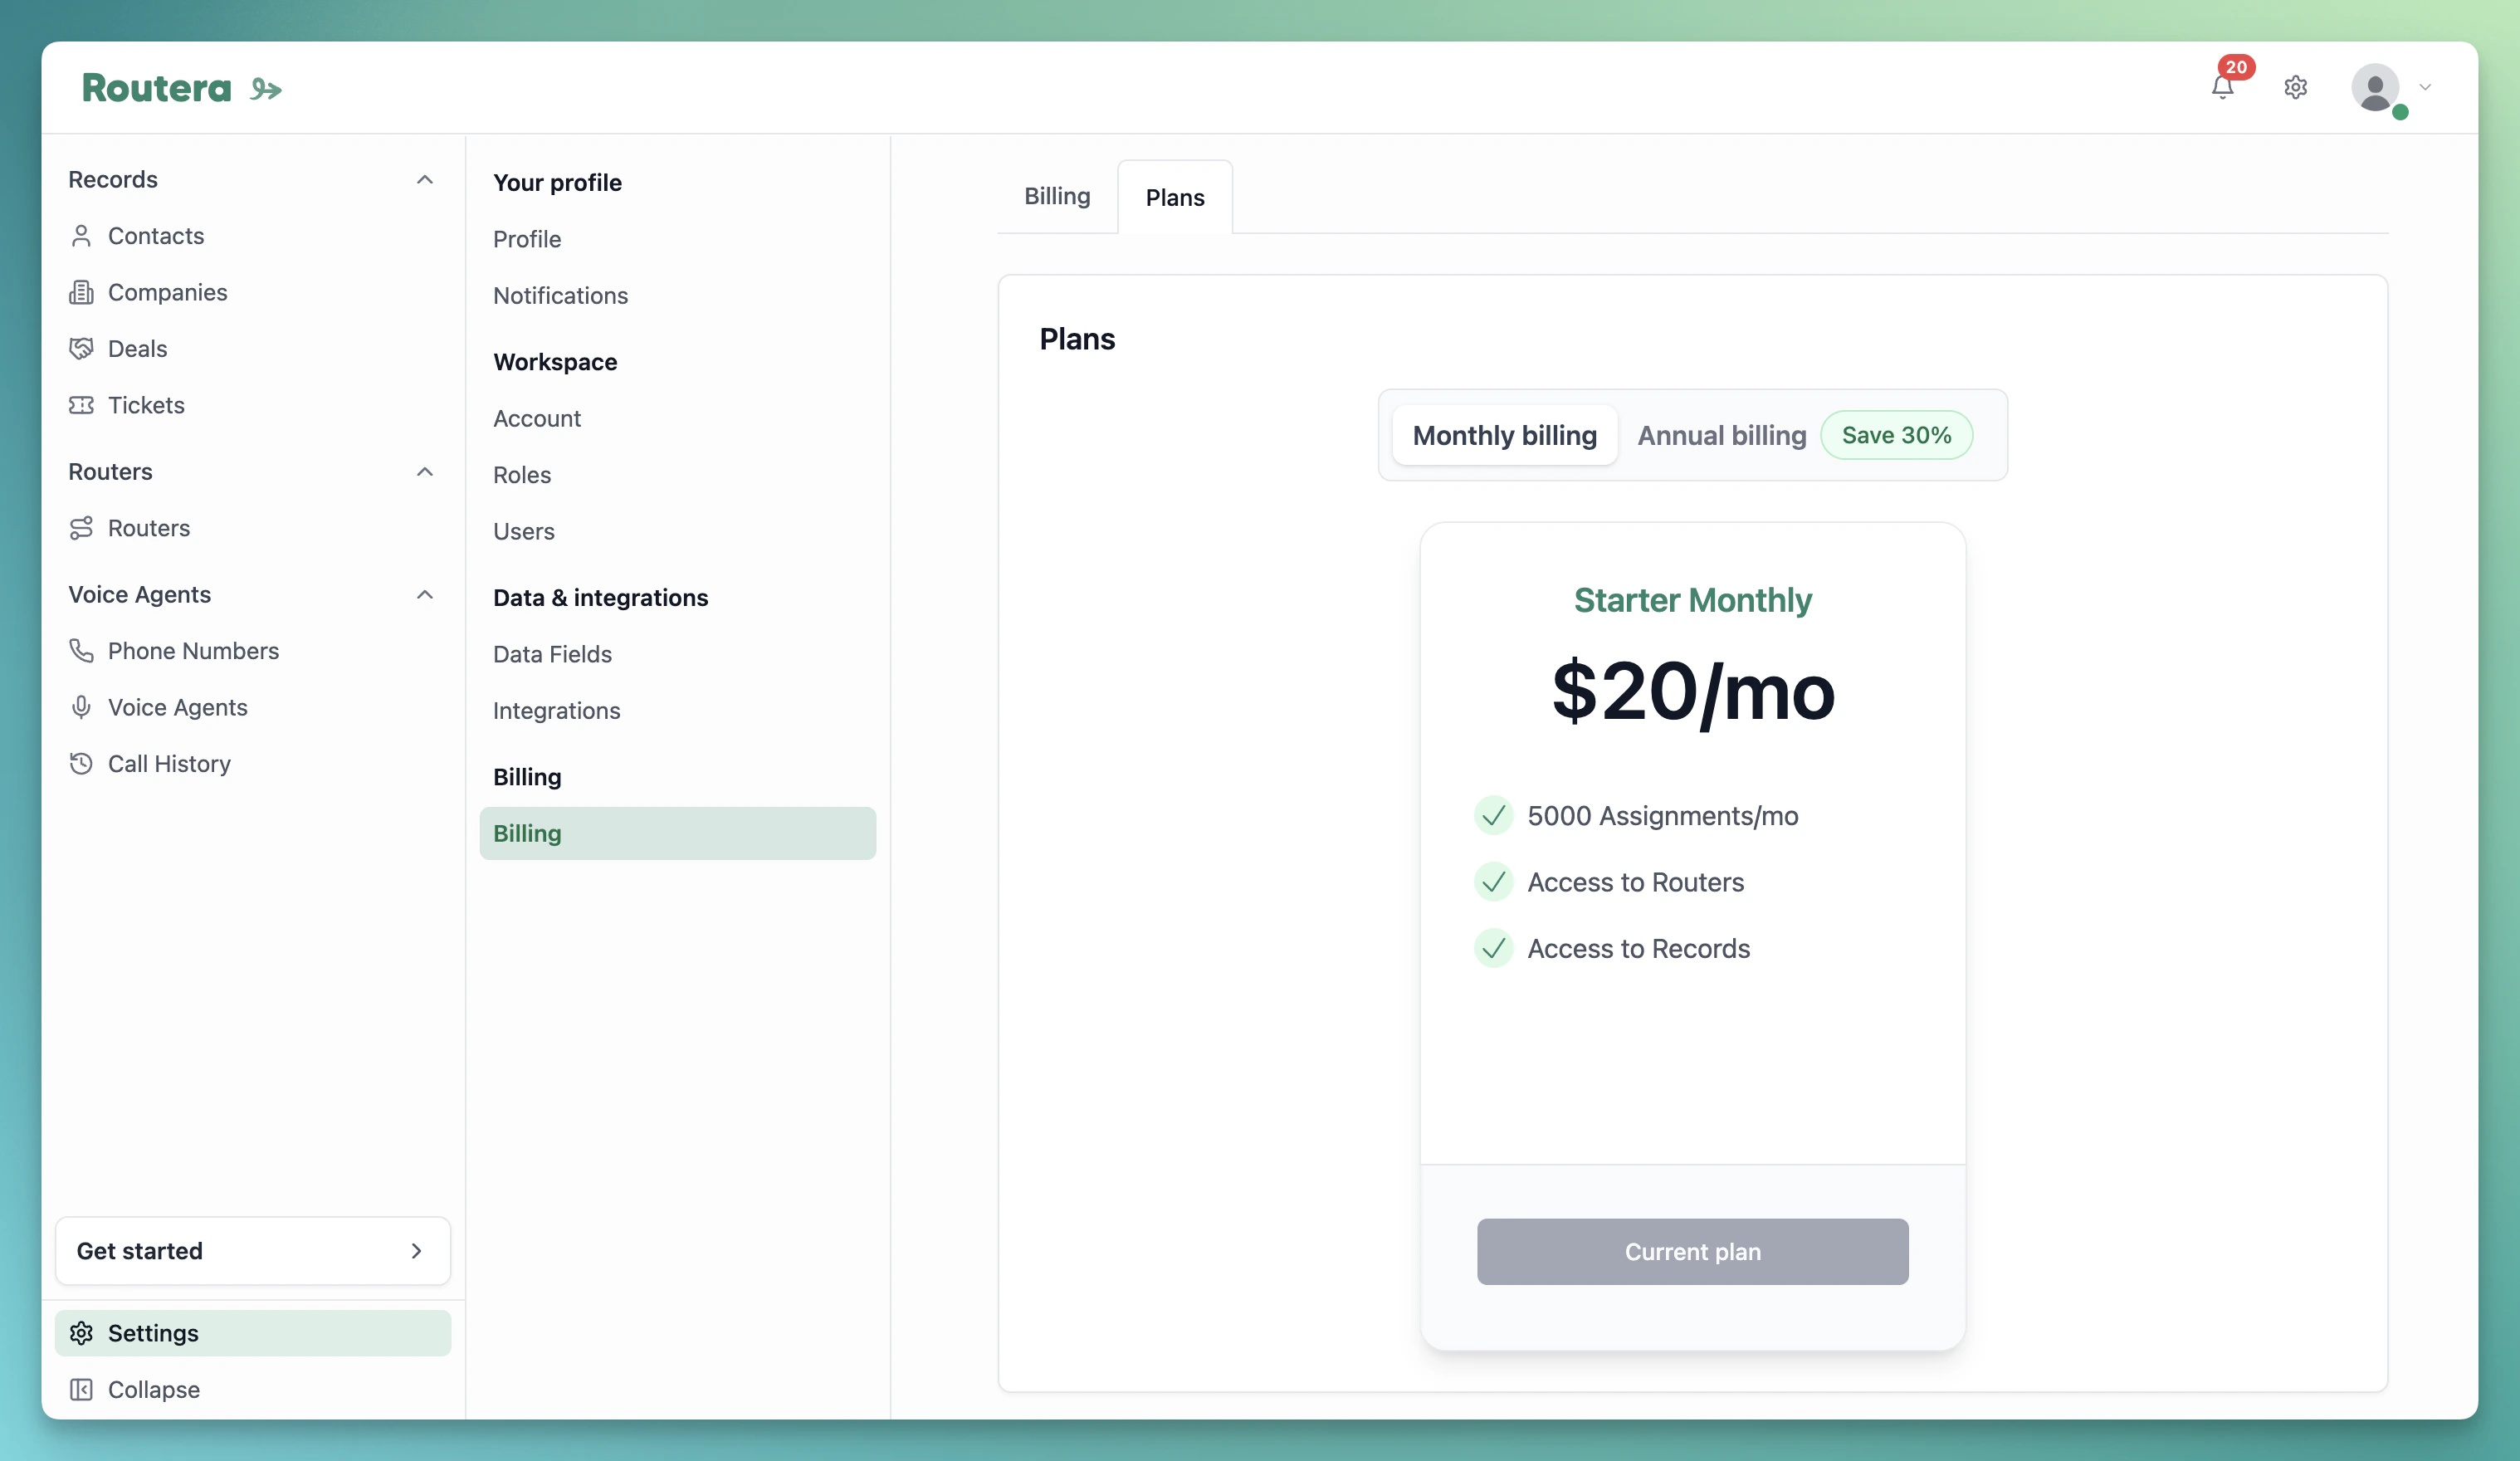
2. Open the **Plans** tab (or click **Upgrade now** on the **Billing** tab when you are on a free or trial plan).
3. Switch between **Monthly billing** and **Annual billing** (**Save 30%** on annual).
4. Compare plan cards (assignments per month, routers, records).
5. On the plan you want, click **Upgrade** (your current plan shows **Current plan** and cannot be selected again).
6. In the **Update Plan** dialog, review **Current Plan**, **New Plan**, seat count, and **Total Amount**.
7. Click **Confirm & Update Plan**.
 If a payment method is already on file, the plan updates and you return to **Billing** with a success message. If not, Routera sends you to **Stripe Checkout** to add one first; after checkout completes, the upgrade finishes automatically.
***
## Add or change payment method
On the **Billing** tab, use the **Payment Method** card:
| State | Action |
| ---------------------- | ----------------------------------------------------- |
| Free or trial, no card | **Upgrade now** — opens **Plans** to pick a paid plan |
| Paid plan, no card | **Add Payment Method** |
| Card on file | **Edit Card** |
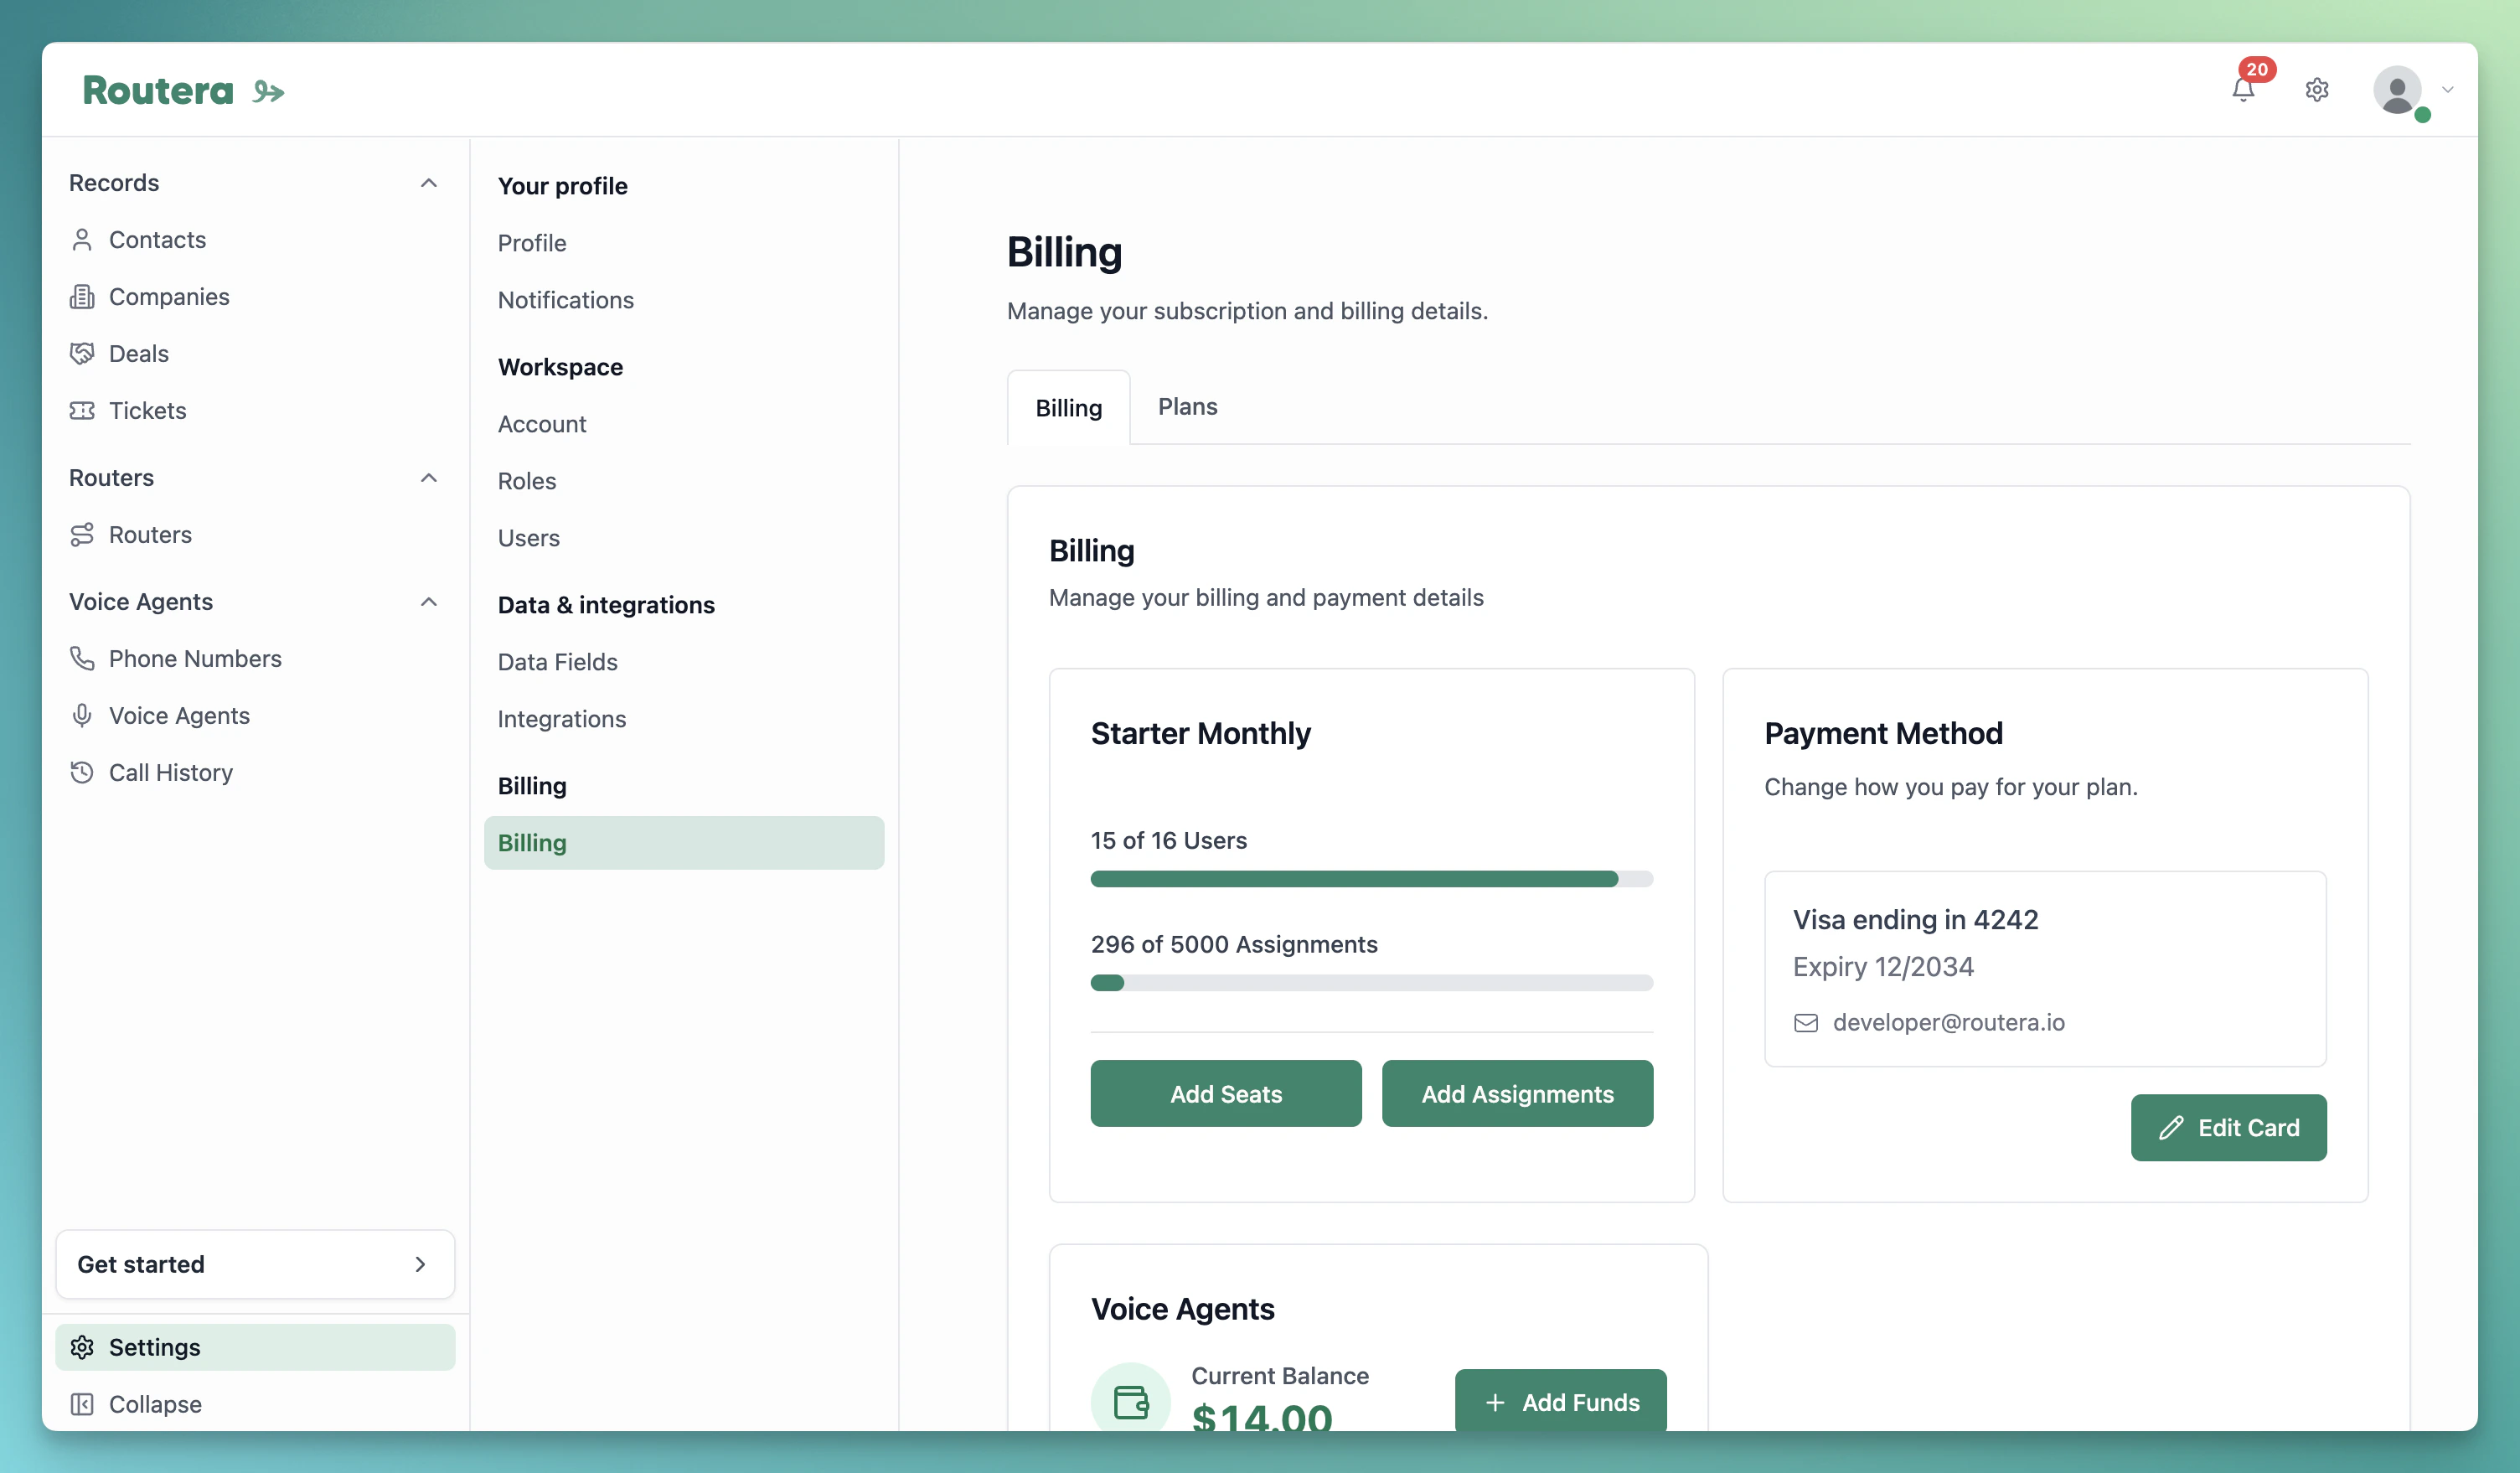
Both **Add Payment Method** and **Edit Card** open **Stripe Checkout** in setup mode. Enter your details there (card or bank, depending on what Stripe offers for your region), then complete checkout. You are returned to **Settings** → **Billing** and the card appears as brand, last four digits, expiry, and billing email.
If a payment method is already on file, the plan updates and you return to **Billing** with a success message. If not, Routera sends you to **Stripe Checkout** to add one first; after checkout completes, the upgrade finishes automatically.
***
## Add or change payment method
On the **Billing** tab, use the **Payment Method** card:
| State | Action |
| ---------------------- | ----------------------------------------------------- |
| Free or trial, no card | **Upgrade now** — opens **Plans** to pick a paid plan |
| Paid plan, no card | **Add Payment Method** |
| Card on file | **Edit Card** |
Both **Add Payment Method** and **Edit Card** open **Stripe Checkout** in setup mode. Enter your details there (card or bank, depending on what Stripe offers for your region), then complete checkout. You are returned to **Settings** → **Billing** and the card appears as brand, last four digits, expiry, and billing email.
 ***
## Usage and add-ons
On the **Billing** tab you can also see:
* **Users** and **Assignments** usage versus your plan limits.
* Options to add **seats** or **assignment** capacity when you are near a limit (charges apply per your subscription).
Some add-ons (for example [Branded Call](/kb/create-phone-number)) require billing on file before you can complete purchase.
Pick **Annual billing** if you want the advertised savings. After upgrading, confirm **Payment Method** is set before buying phone numbers or other paid add-ons.
***
## Usage and add-ons
On the **Billing** tab you can also see:
* **Users** and **Assignments** usage versus your plan limits.
* Options to add **seats** or **assignment** capacity when you are near a limit (charges apply per your subscription).
Some add-ons (for example [Branded Call](/kb/create-phone-number)) require billing on file before you can complete purchase.
Pick **Annual billing** if you want the advertised savings. After upgrading, confirm **Payment Method** is set before buying phone numbers or other paid add-ons.