Create a capacity
- Open Settings → Users → Capacities.
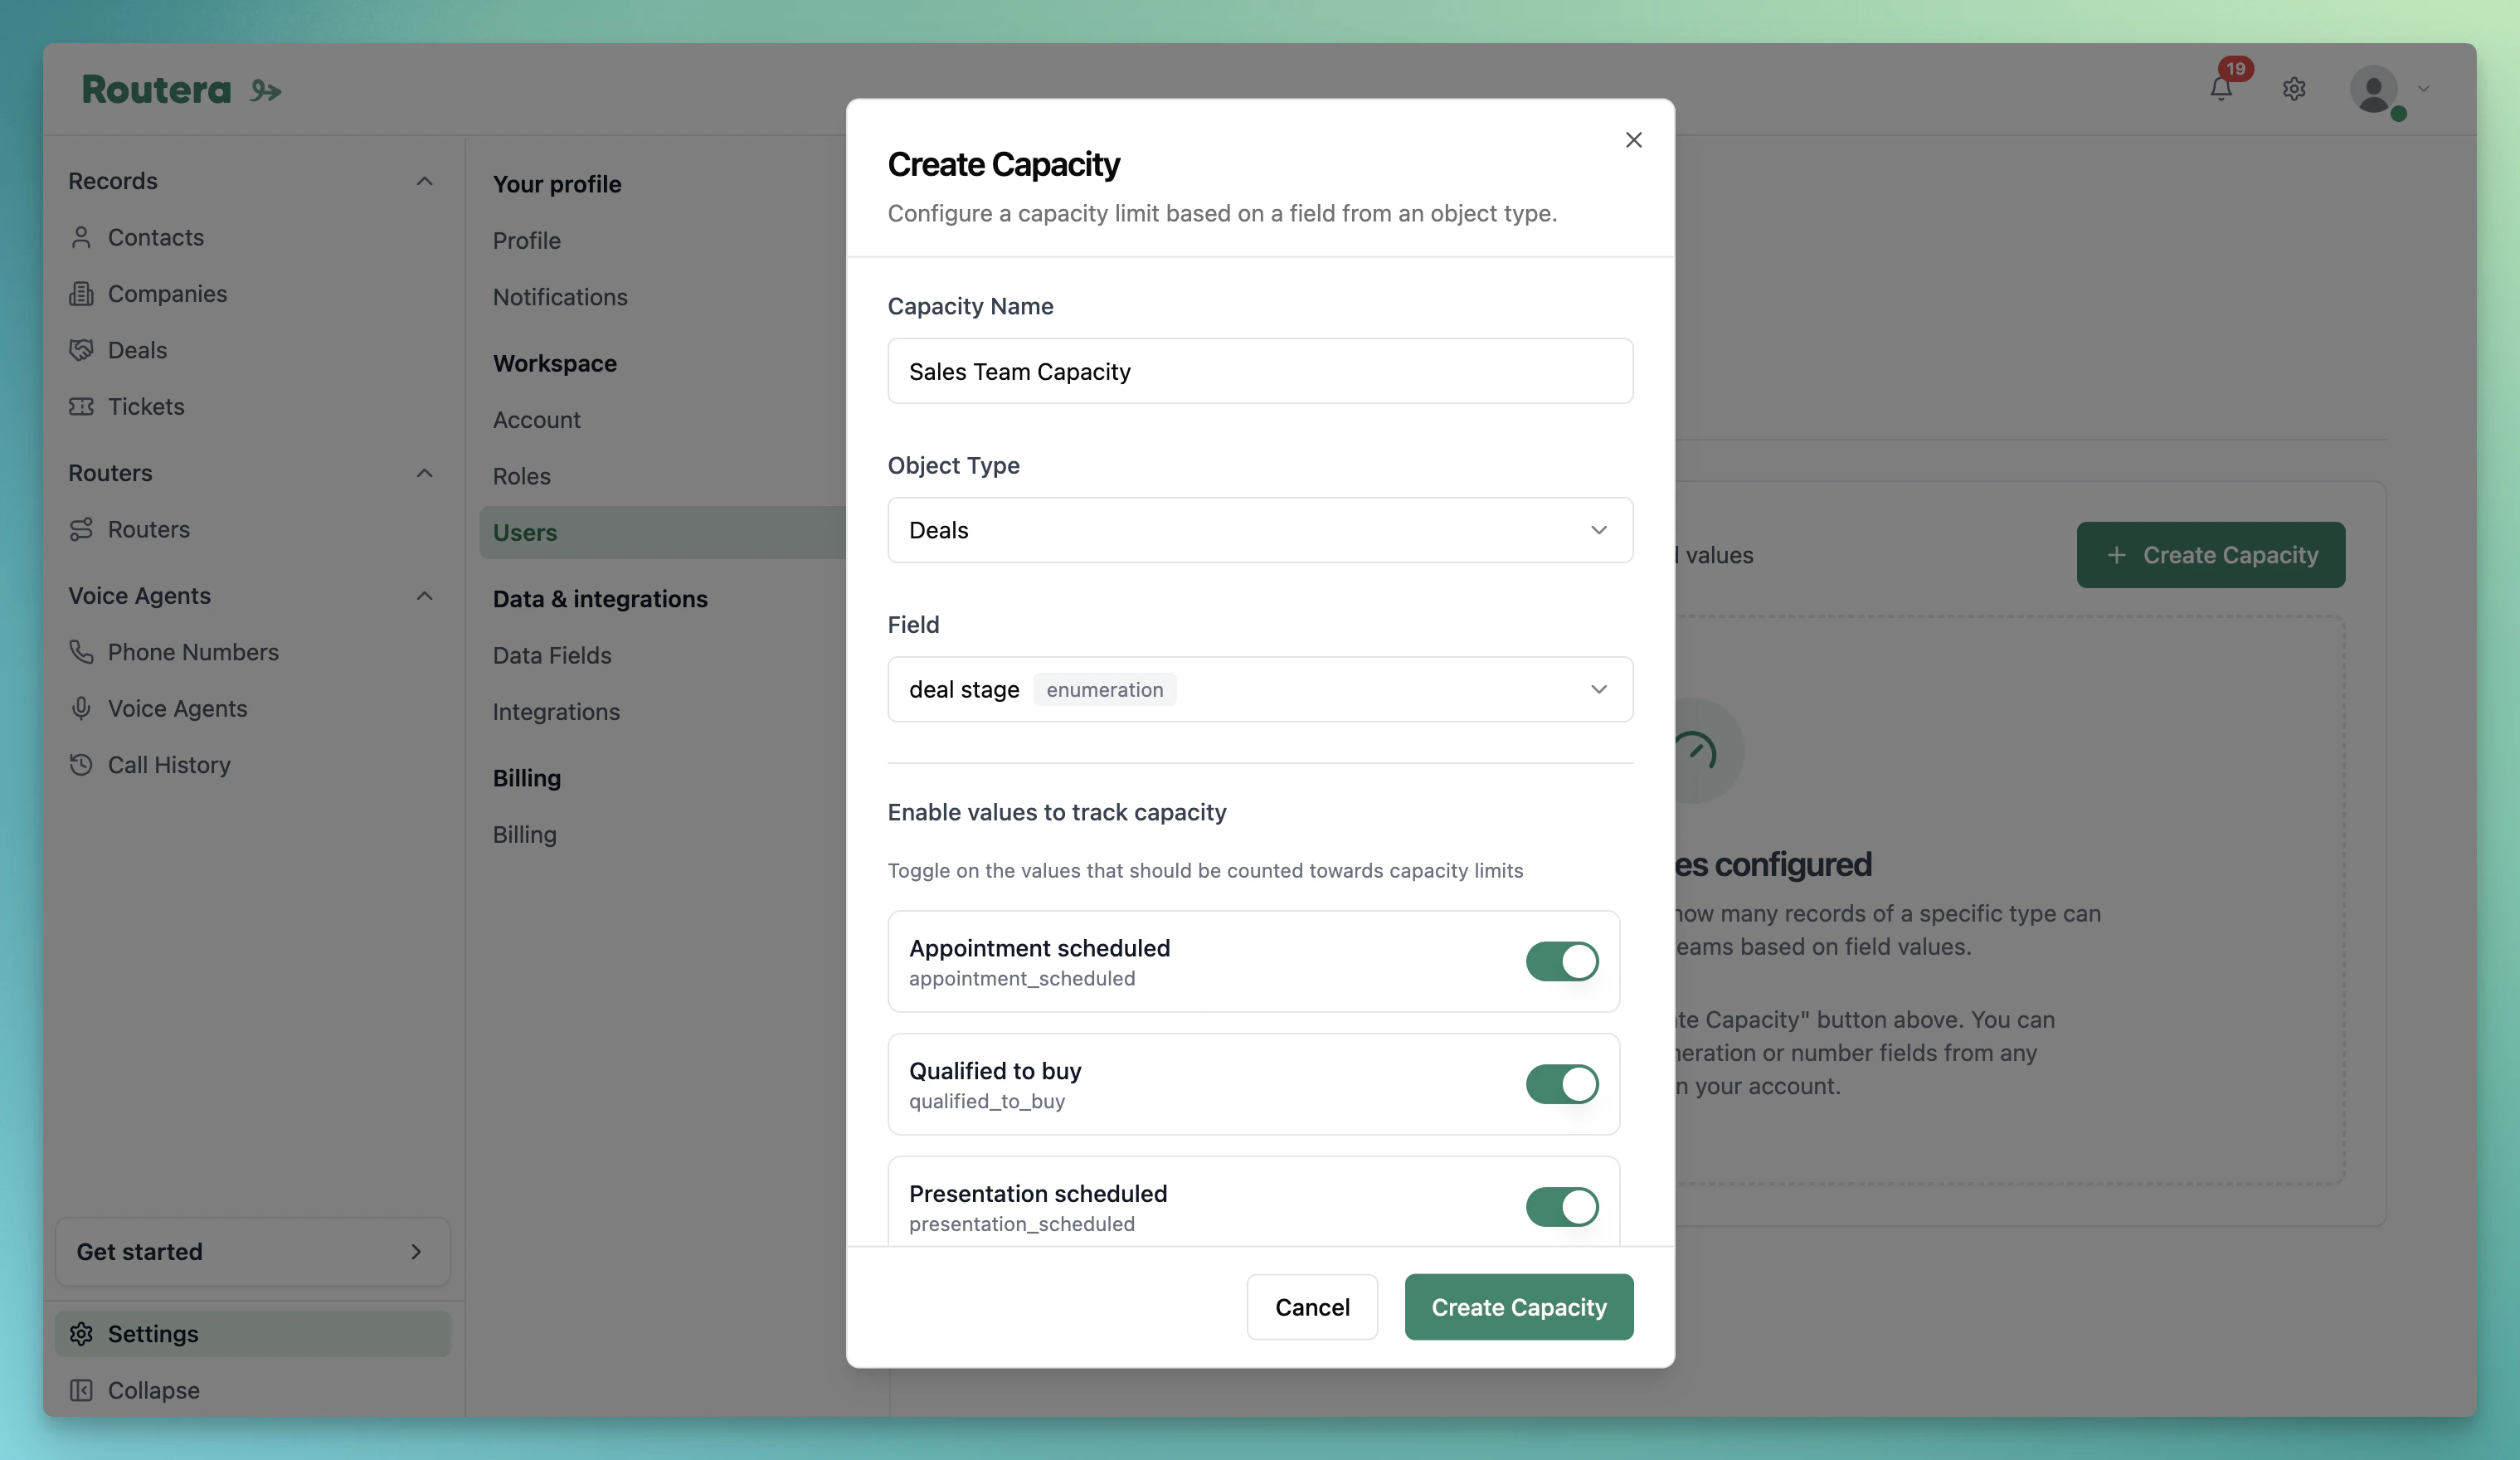
- Click Create Capacity.
- Enter a name, choose an object type and enumeration field (each field can only be used once).
- Enable the field values that should count toward the limit.
- Optionally turn on reset counters monthly, then click Create Capacity.
If HubSpot is connected and the field is not mapped, you will see a warning. Map the field under Settings → Integrations so values stay in sync—see Integrate HubSpot.
Assign users and teams
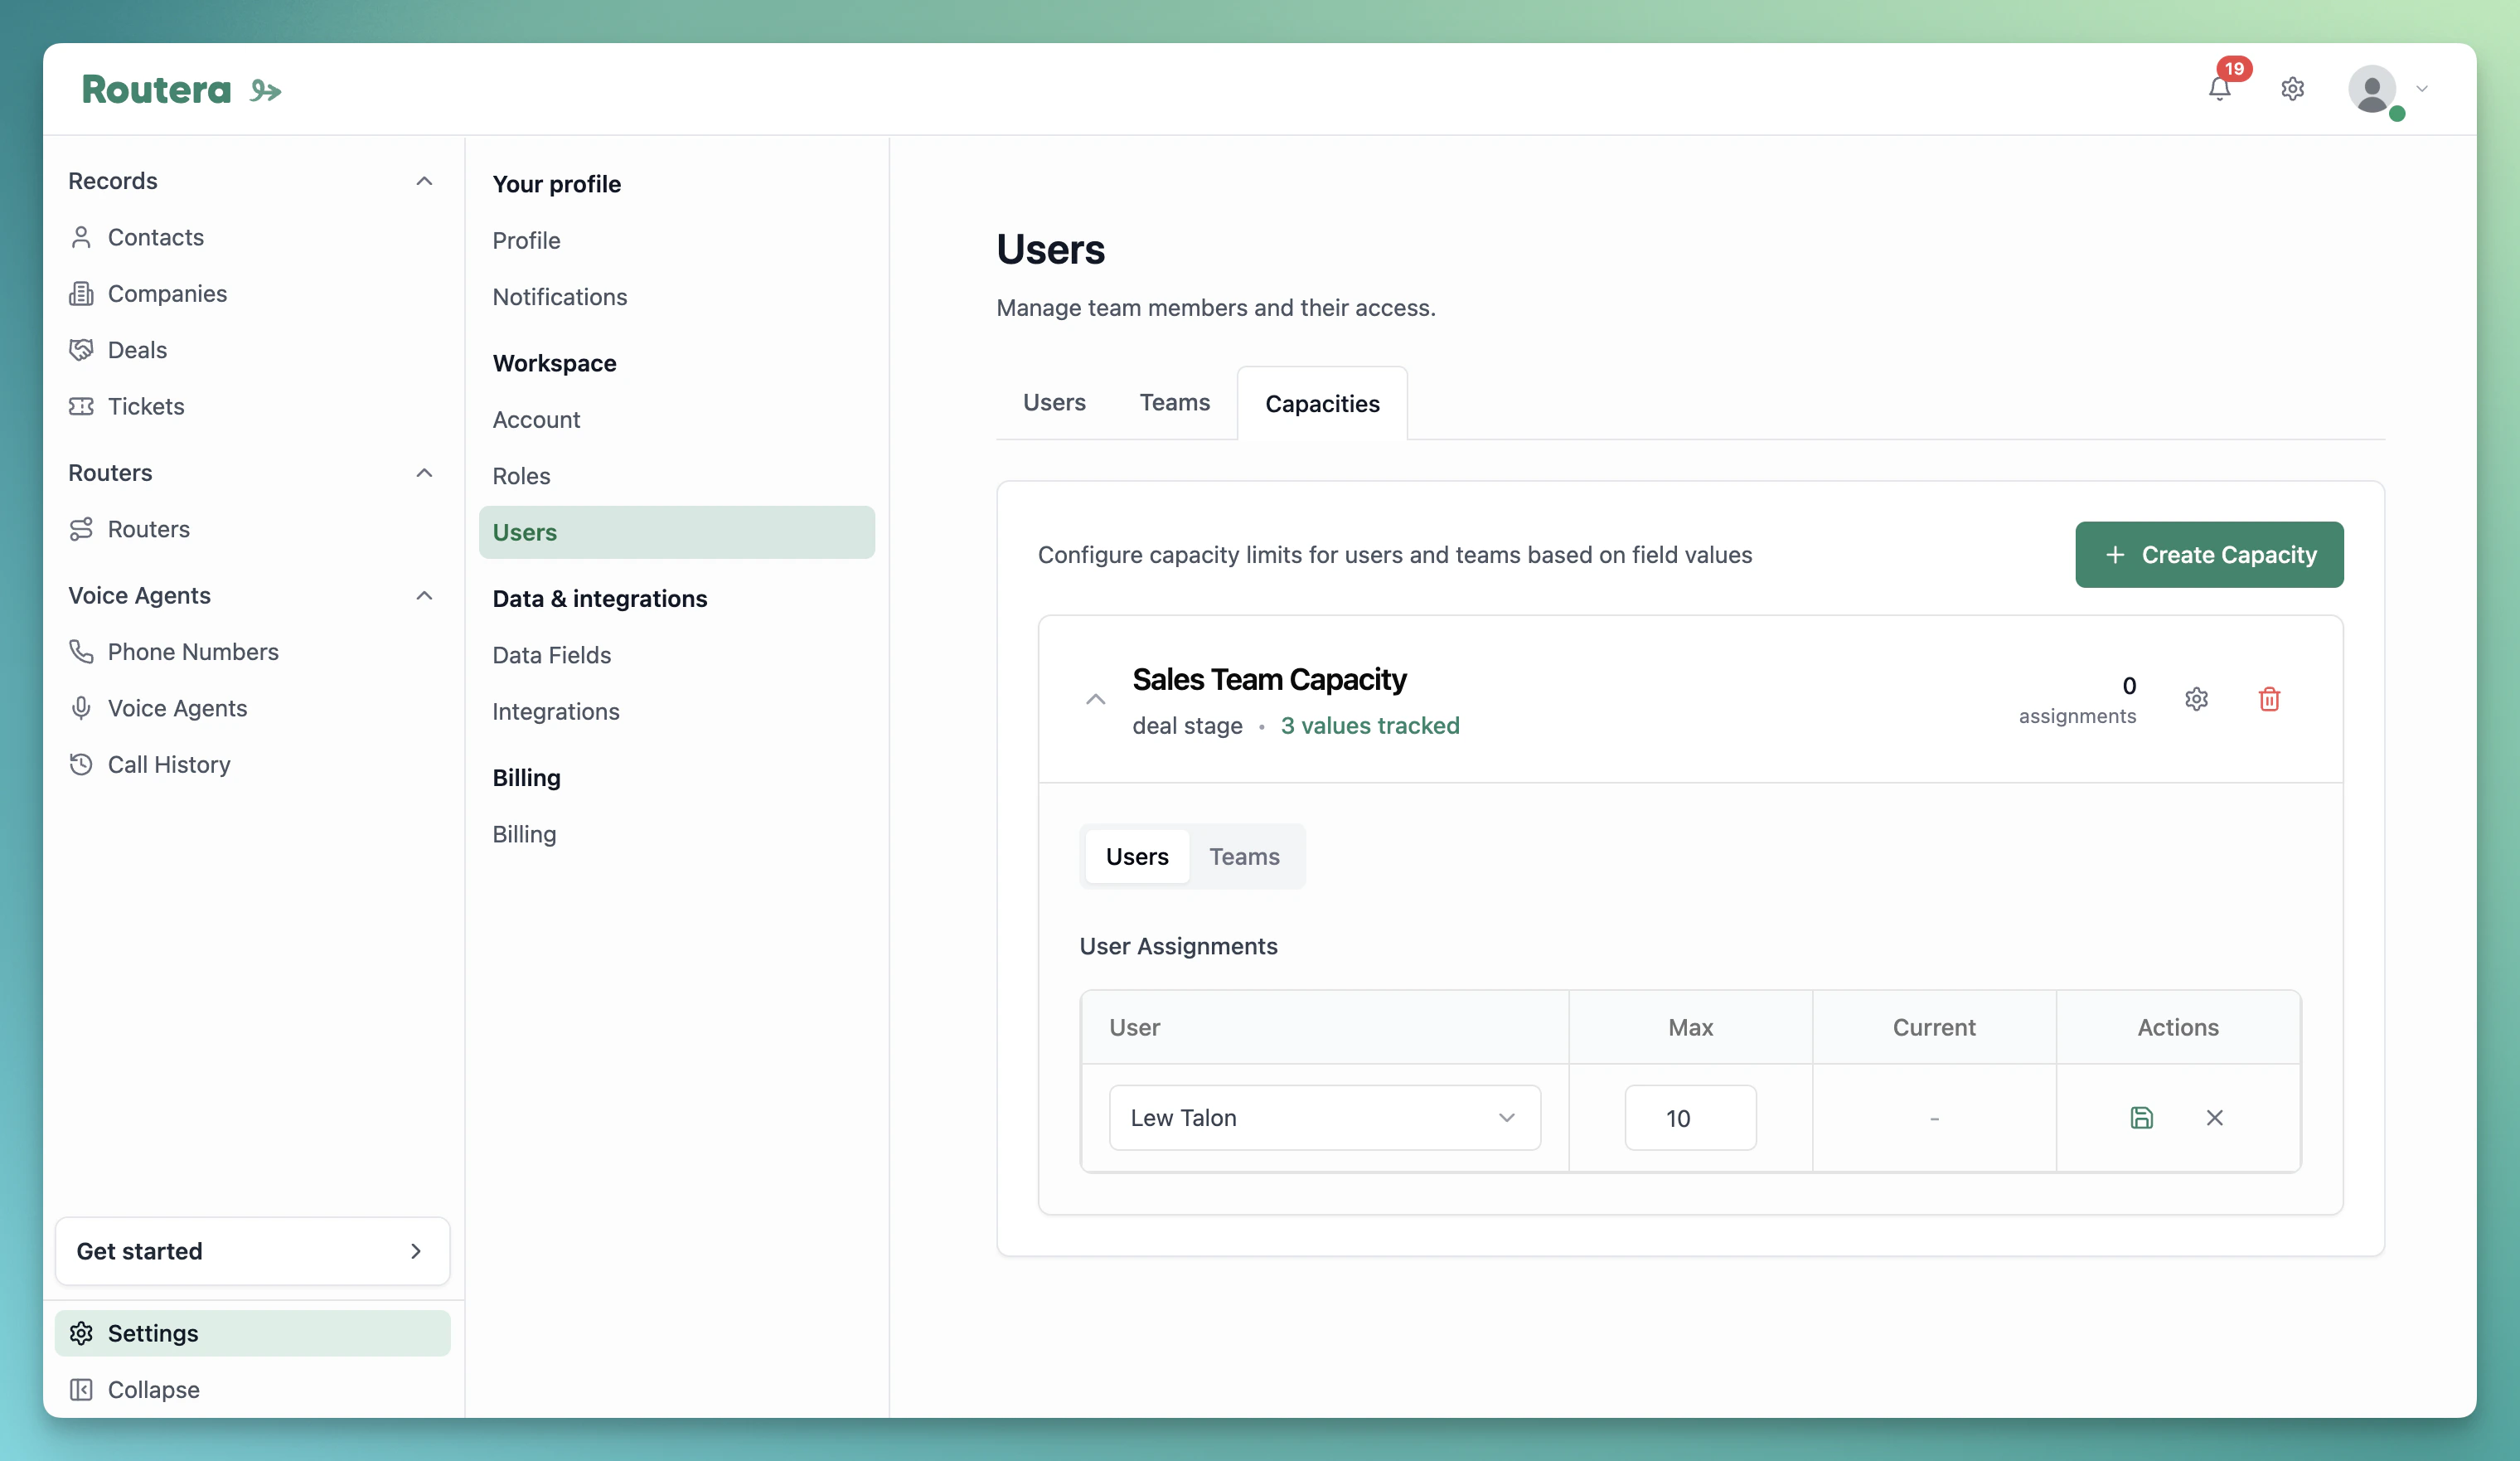
- Expand a capacity card on the Capacities page.
- Open the Users or Teams tab.
- Click Add User or Add Team, choose who to assign, set Max, and save.
- Use Current and the progress indicator to see usage (green below 70%, yellow 70–89%, red 90%+).
Edit or delete
- Assignment — use edit or delete on a row in the Users or Teams tab to change Max or remove someone.
- Capacity settings — use the settings control on the capacity card to change the name or which field values count.
- Delete capacity — removes the capacity and all assignments.