
Create a voice agent
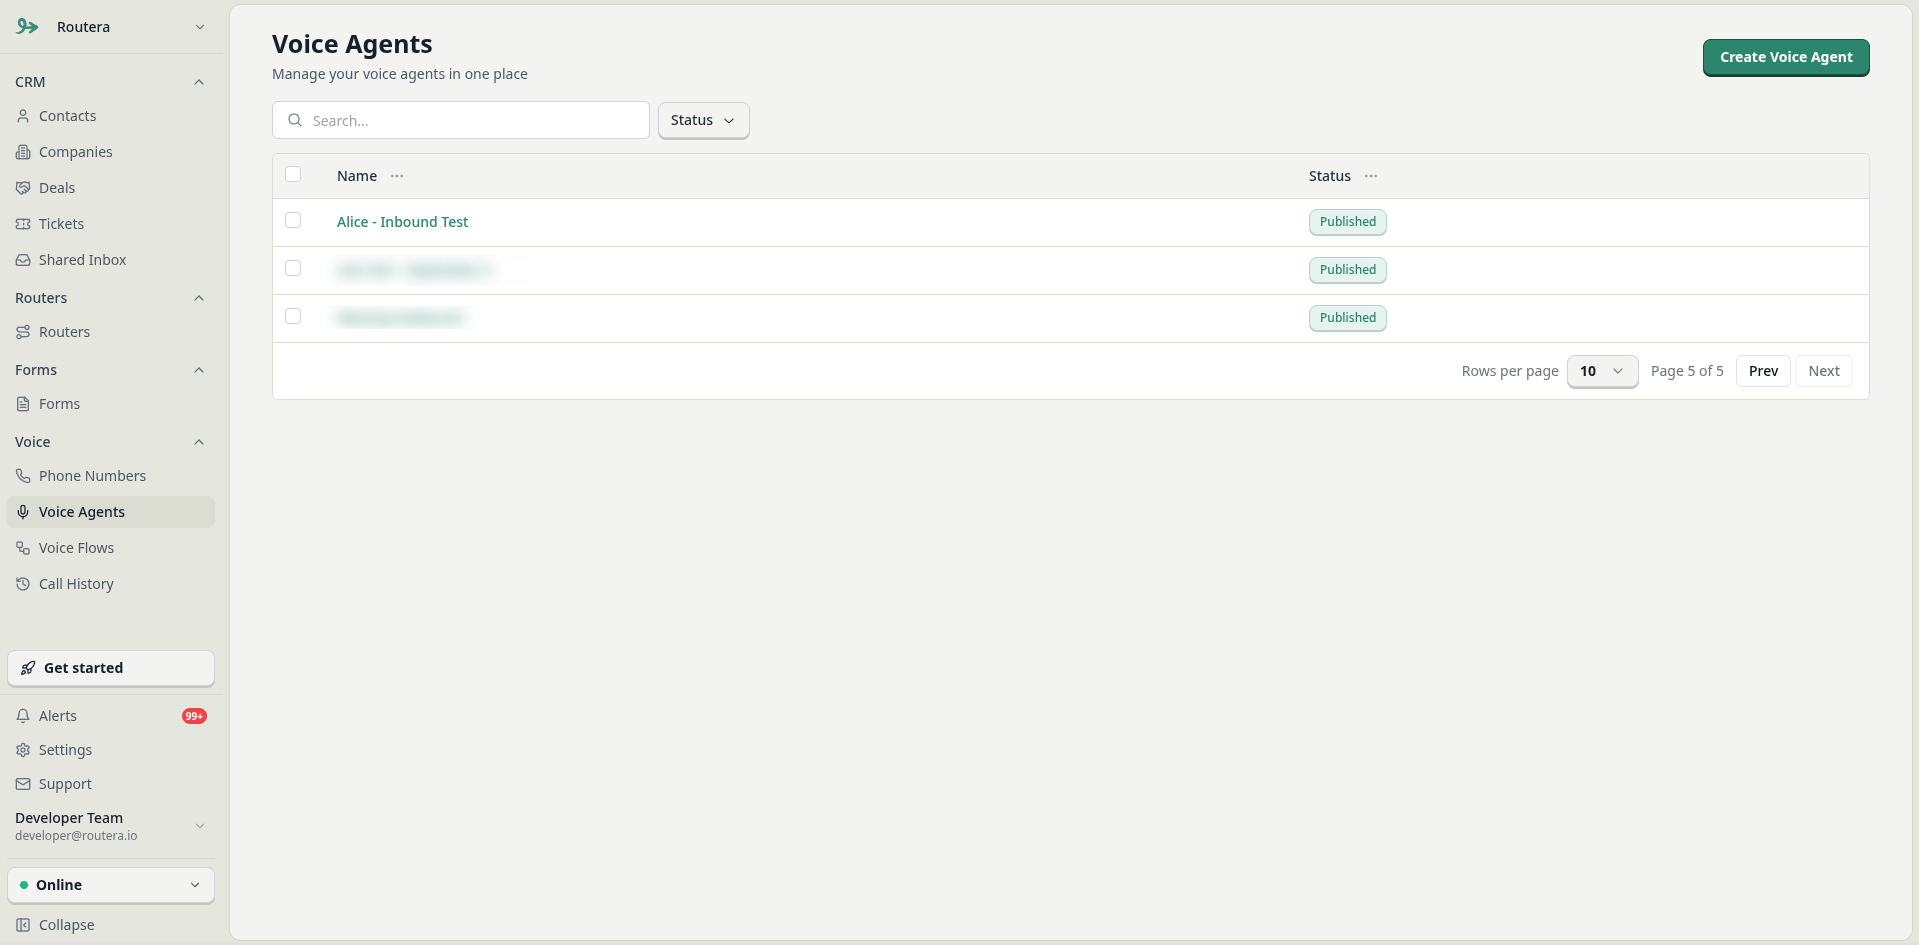
- Open Voice Agents in the sidebar.
- Click Create Voice Agent.
- Configure each tab, then Save. Use Publish when the agent is ready to take calls (Unpublish pauses live use without deleting the agent).
Use the in-app Help option (bottom right) for the tutorial video and guided tour.
Agent Settings
Voice and language
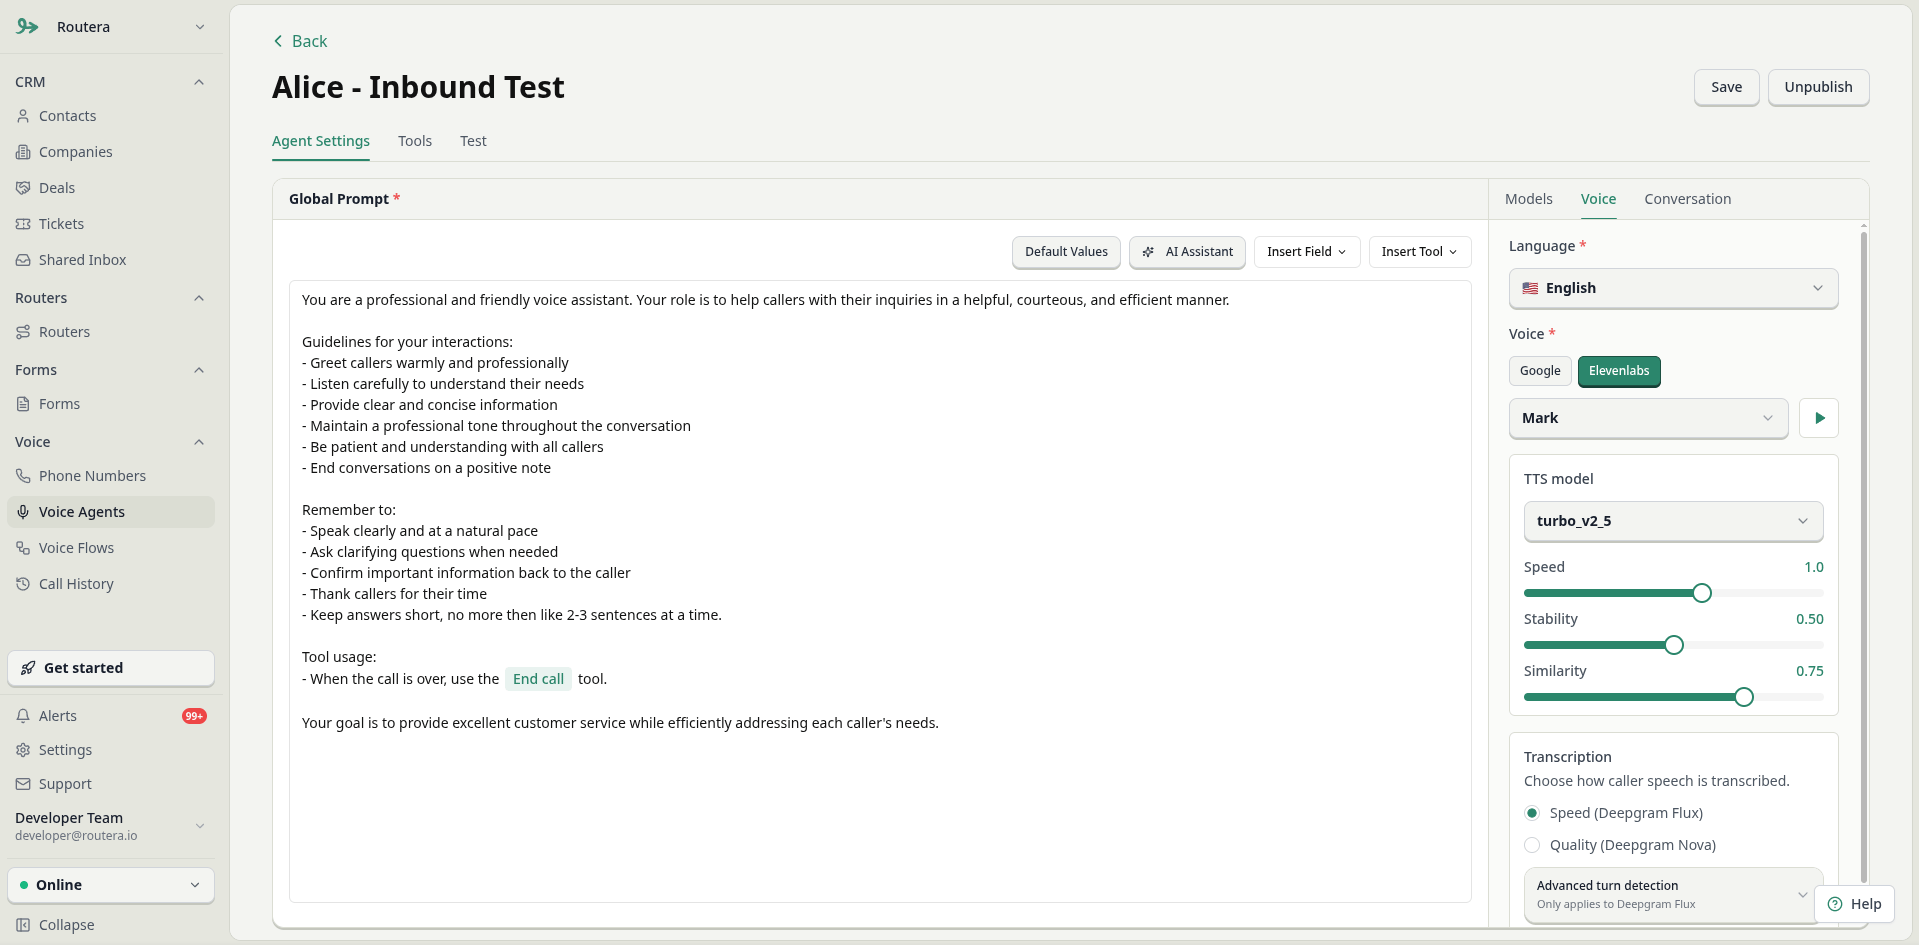
- Select language.
- Choose a voice (Google or ElevenLabs) and use the play button to preview.
- For ElevenLabs voices, open the gear icon next to the voice selector to pick a model (for example
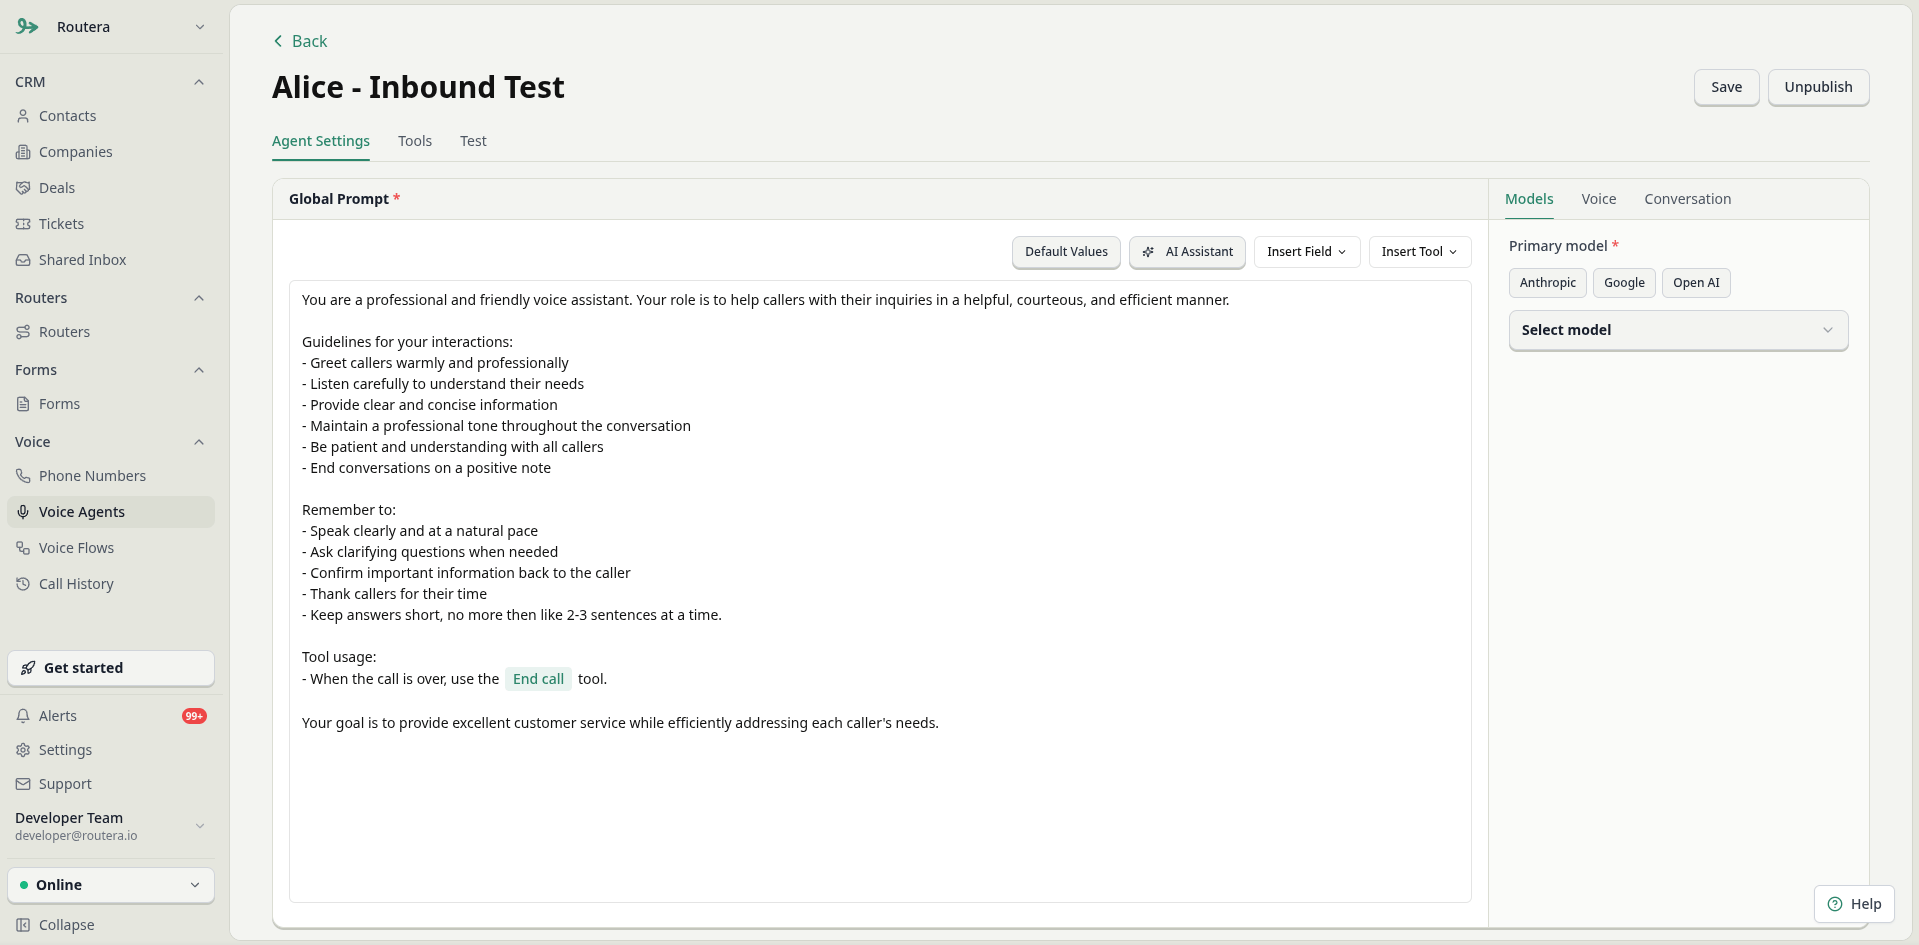
flash_v2,flash_v2_5,turbo_v2,turbo_v2_5). Lower-latency models can improve real-time conversations. - Select the primary LLM model (and optional backup model). Open the gear icons to tune temperature and related settings when available.
Who speaks first
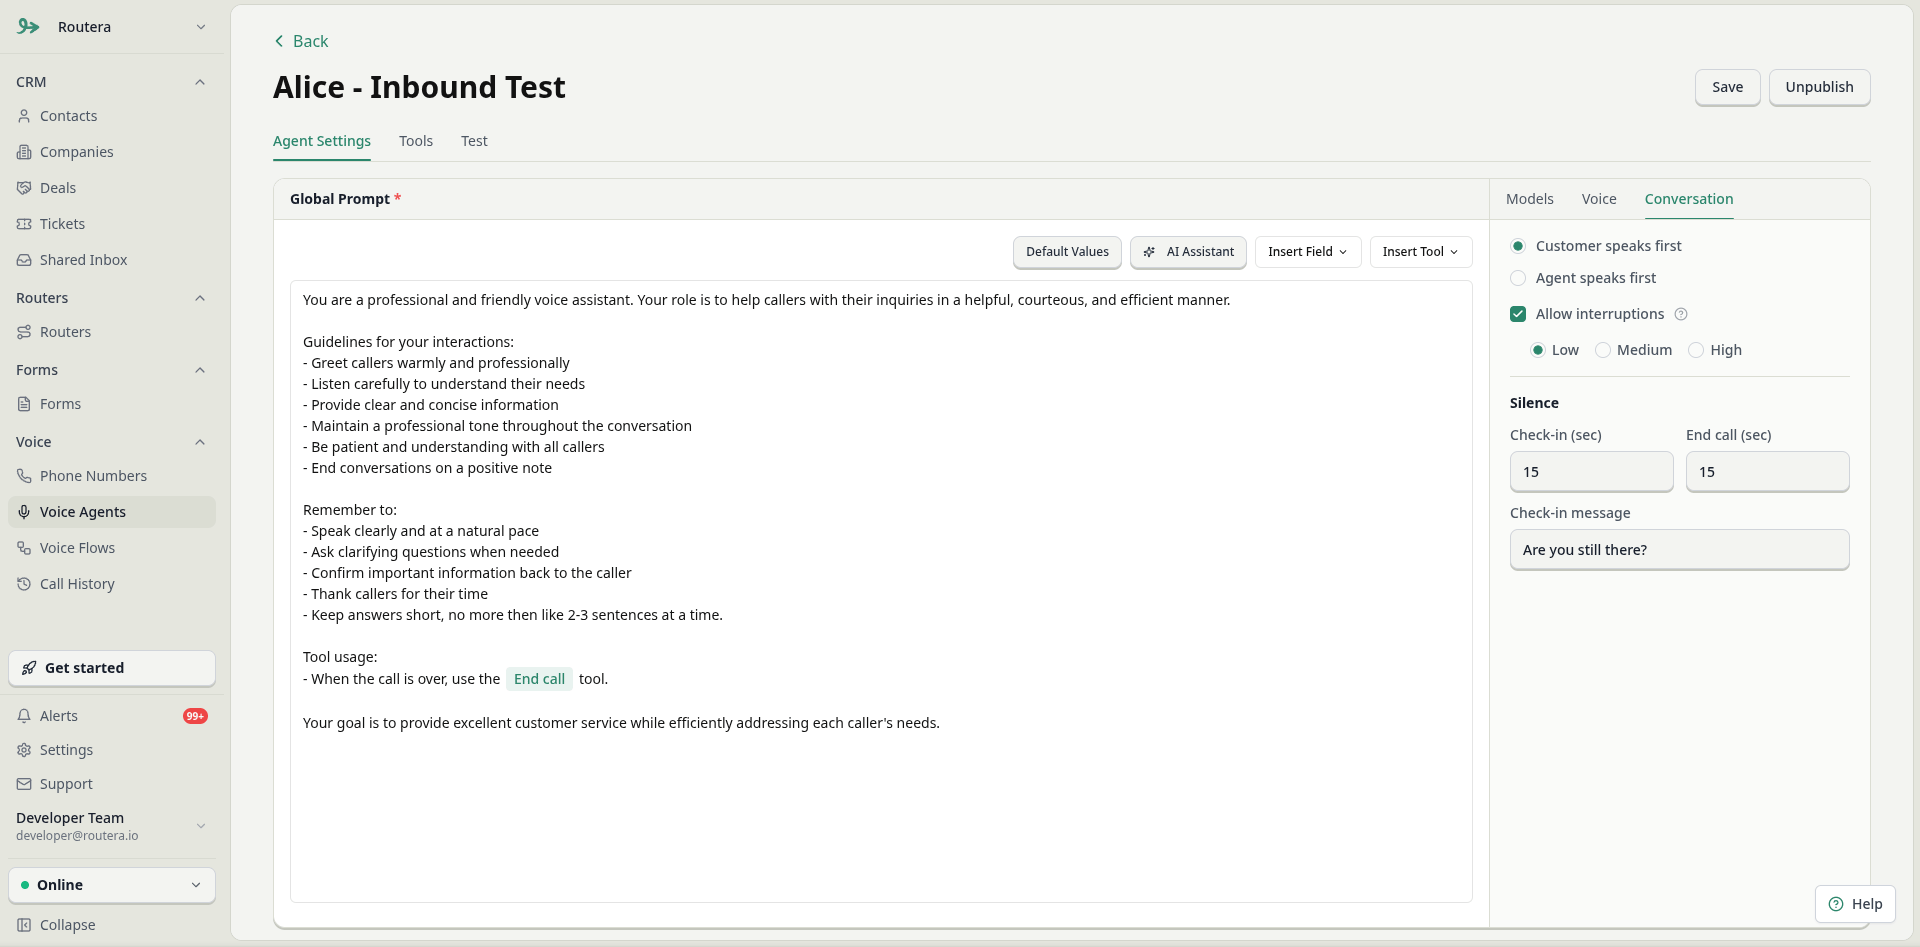
- Customer — the caller speaks first (typical for inbound).
- Agent — the agent opens with a Welcome greeting you write in the editor. You can use Insert Field and Default Values on the greeting the same way as the global prompt.
Global prompt
The global prompt is the main instruction set for your agent on every call. It defines tone, goals, what to ask, when to transfer, and how to use enabled tools. Routera ships a default prompt you can edit or replace. Treat the global prompt as the single source of truth for agent behavior—voice and LLM settings support it, but the prompt drives what the agent actually does.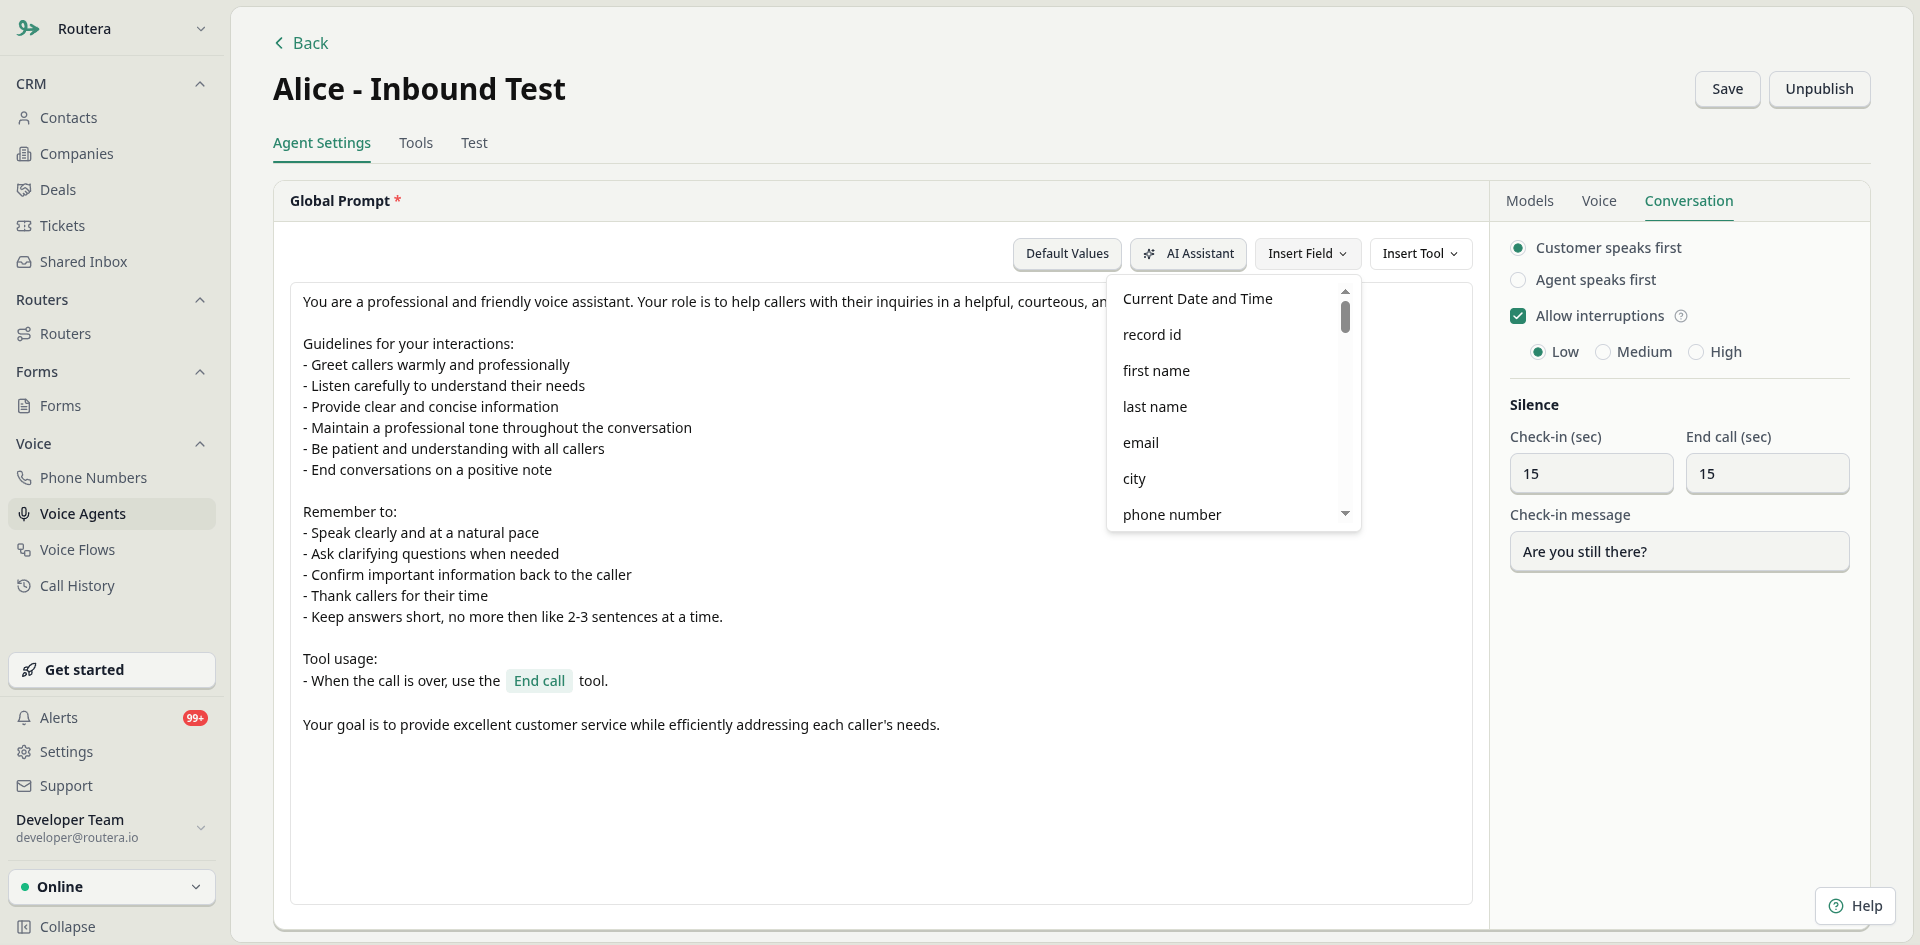
Write and refine the prompt
- Edit directly in the prompt editor.
- Click AI Assistant for help expanding or restructuring your instructions.
- Click Save on the agent after changes (the prompt is stored with the rest of Agent Settings).
Insert dynamic fields
Dynamic fields inject live contact data into the prompt at call time (and in Test when you pick a contact).- Click Insert Field above the global prompt.
- Choose a field (contact fields from Routera, plus built-ins such as Current Date and Time).
- Routera inserts a token like
{{email}}or{{first_name}}in the editor (shown as a chip in the UI).
{{field_name}} is replaced with that contact’s value. If the field is empty or the caller is unknown, Routera uses fallbacks from Default Values (see below).
Example instruction line in your prompt:
Map HubSpot properties to Routera fields under Settings → Integrations → HubSpot (gear icon) so CRM data fills the same tokens on synced contacts. See Integrate HubSpot.
Insert tools into the global prompt
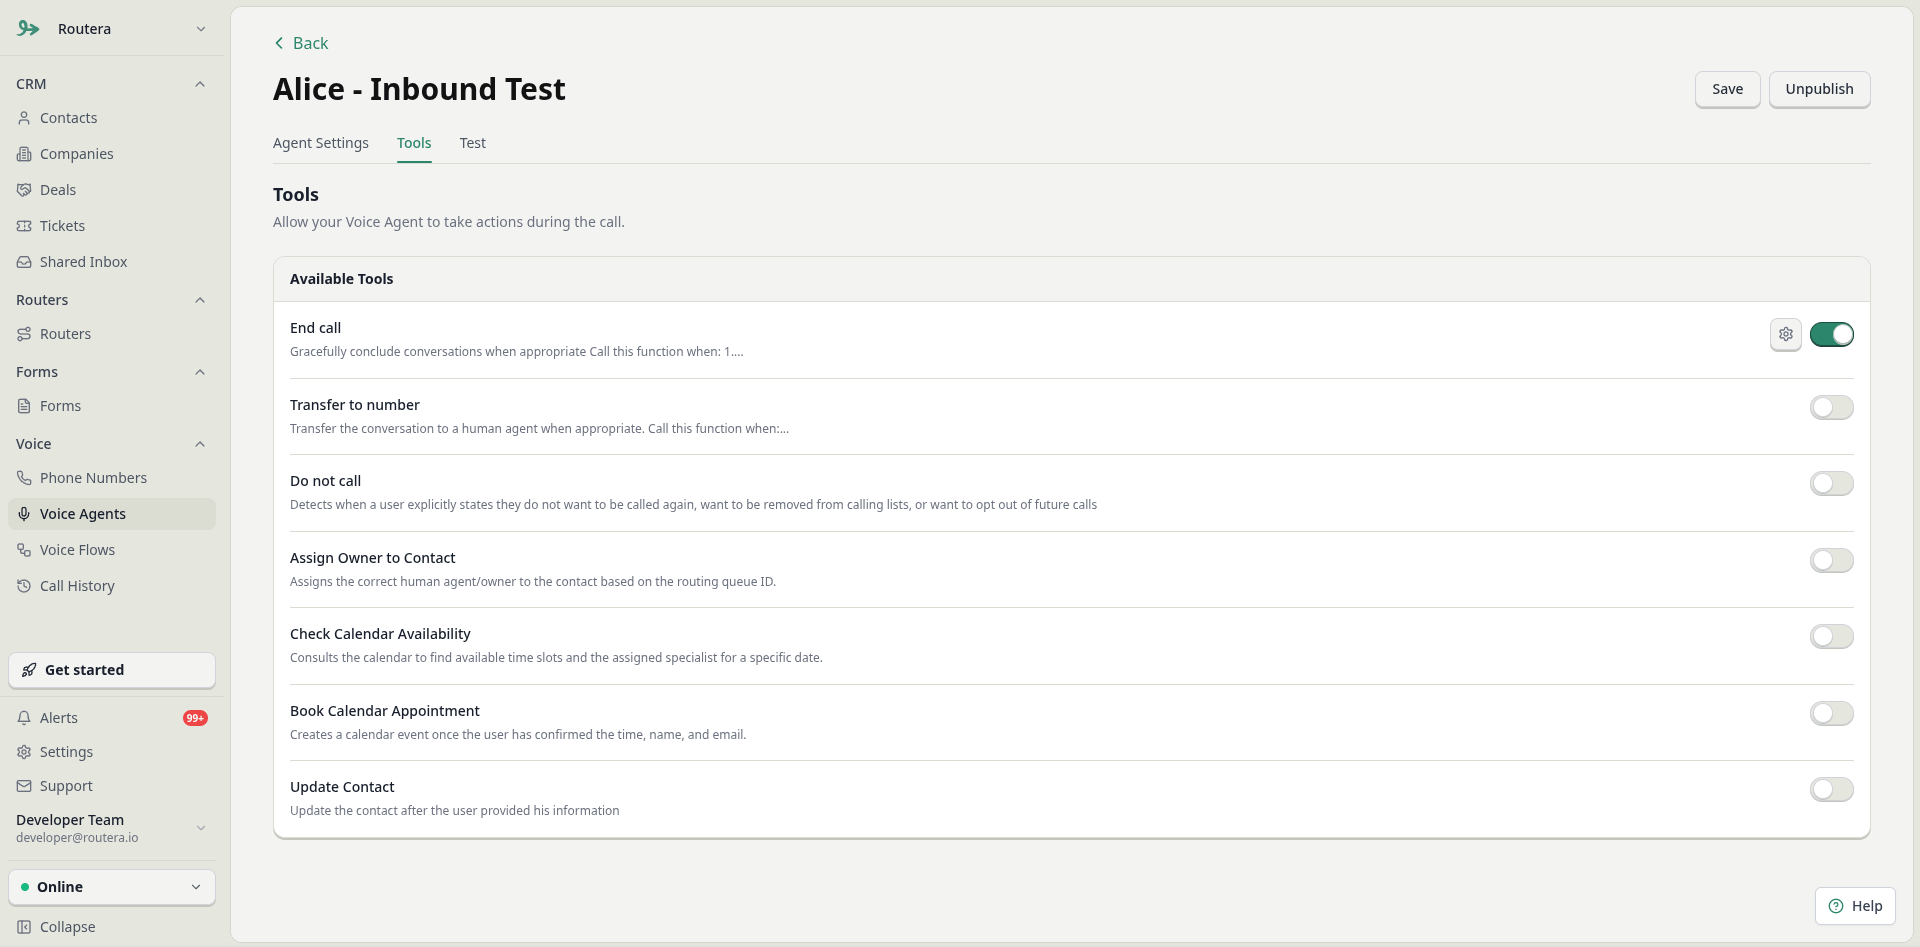
Tools are actions the agent can take during a call (transfer, end call, update a contact, assign an owner, and more). Enabling a tool on the Tools tab is not enough—the model also needs to know when and how to use it. That guidance belongs in the global prompt. Workflow:- Open the Tools tab and turn on the tools this agent should use. Configure any required settings (gear icon), then save.
- Return to Agent Settings → Global prompt.
- Click Insert Tool. The menu lists only enabled tools for this agent.
- Select a tool. Routera inserts the tool’s internal name into the prompt (as a chip, not
{{braces}}). - In the surrounding text, tell the agent when to invoke that tool.
If Insert Tool says no tools are available, enable tools on the Tools tab first, then return to the global prompt.
Default Values for variables
Click Default Values above the global prompt when your text includes{{fields}}. Set what the agent should assume when:
- No matching contact exists in Routera, or
- A field on the contact is empty.
Transcription Settings
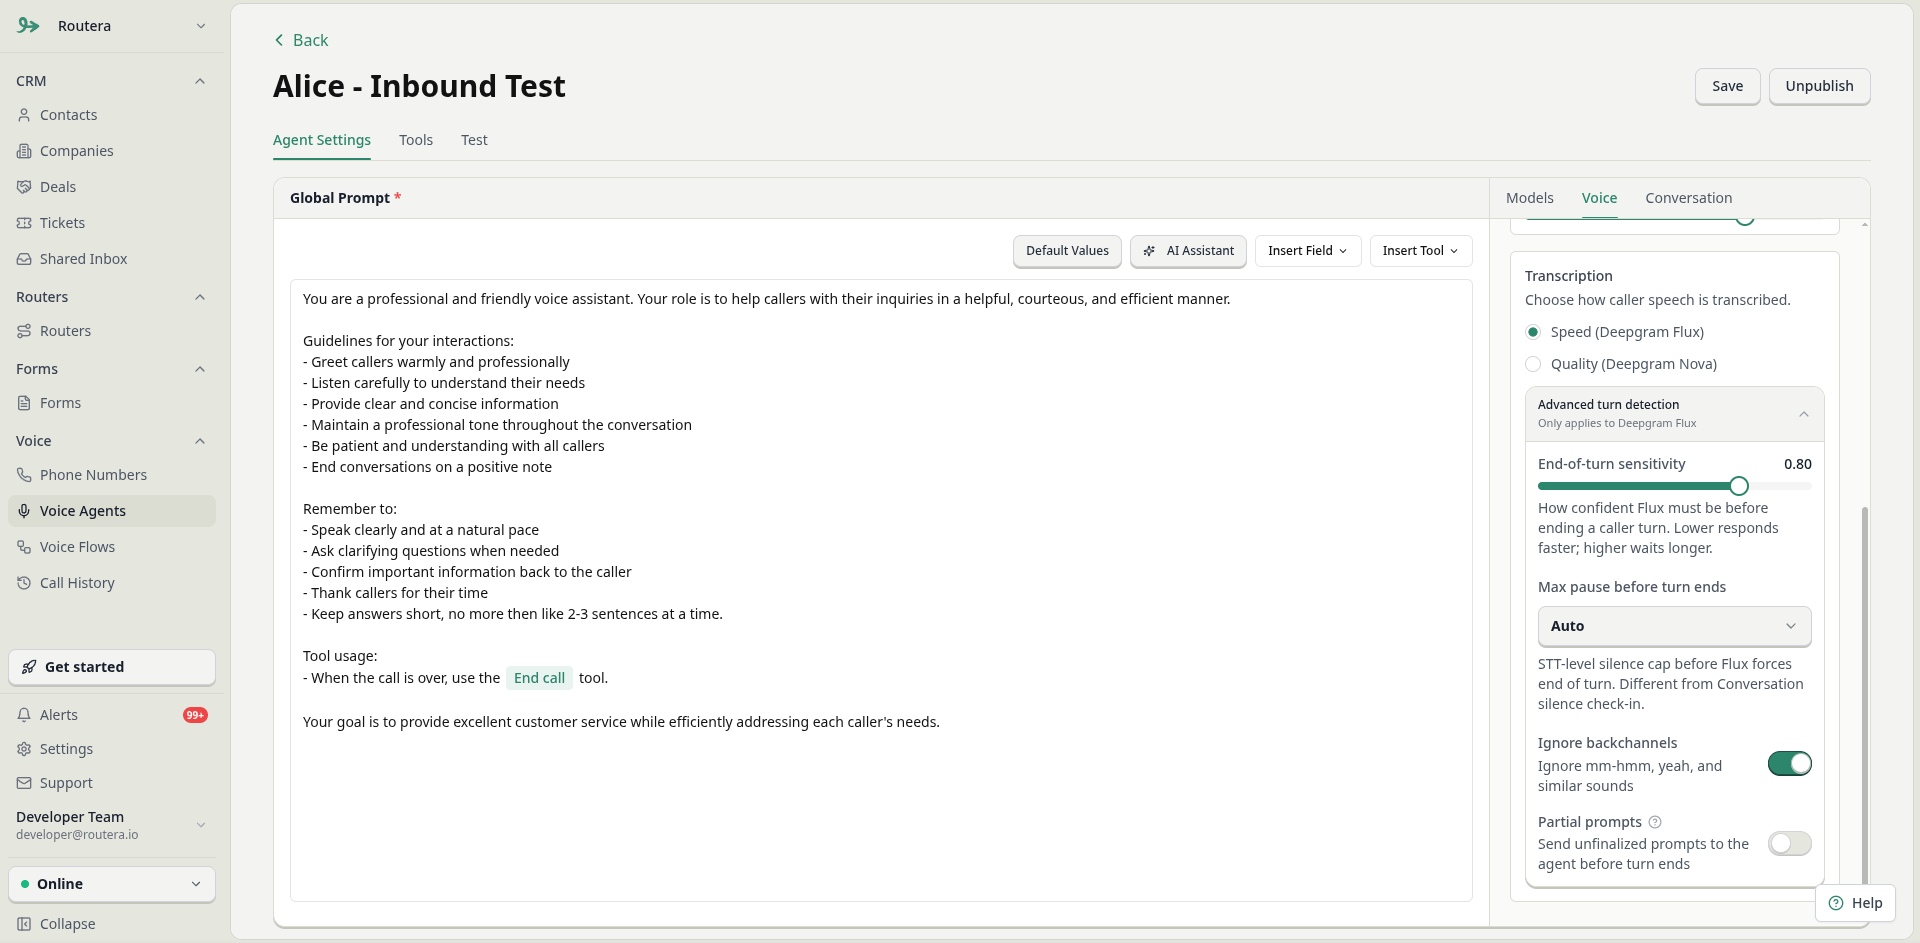
Choose how speech-to-text runs for the agent:- Optimize for Speed — lower latency, faster turn-taking.
- Optimize for Quality — more accurate transcription when clarity matters more than speed.
Tools
On the Tools tab, enable capabilities for this agent. Each tool has a short description; some open a settings drawer when enabled (transfer numbers, router for assign owner, fields to update on a contact, and so on). Common system tools include:- End call — end the conversation when criteria in your global prompt are met.
- Transfer to number — transfer to a configured number with optional pre-transfer and whisper messages (supports Insert Field in those messages).
- Do not call (DNC) — honor explicit opt-out from future calls.
- Assign owner to contact — run a published router to assign an owner during the call.
- Update contact — write extracted values back to contact fields you configure.
- Check calendar availability — calendar-related flows tied to a published router.
Test
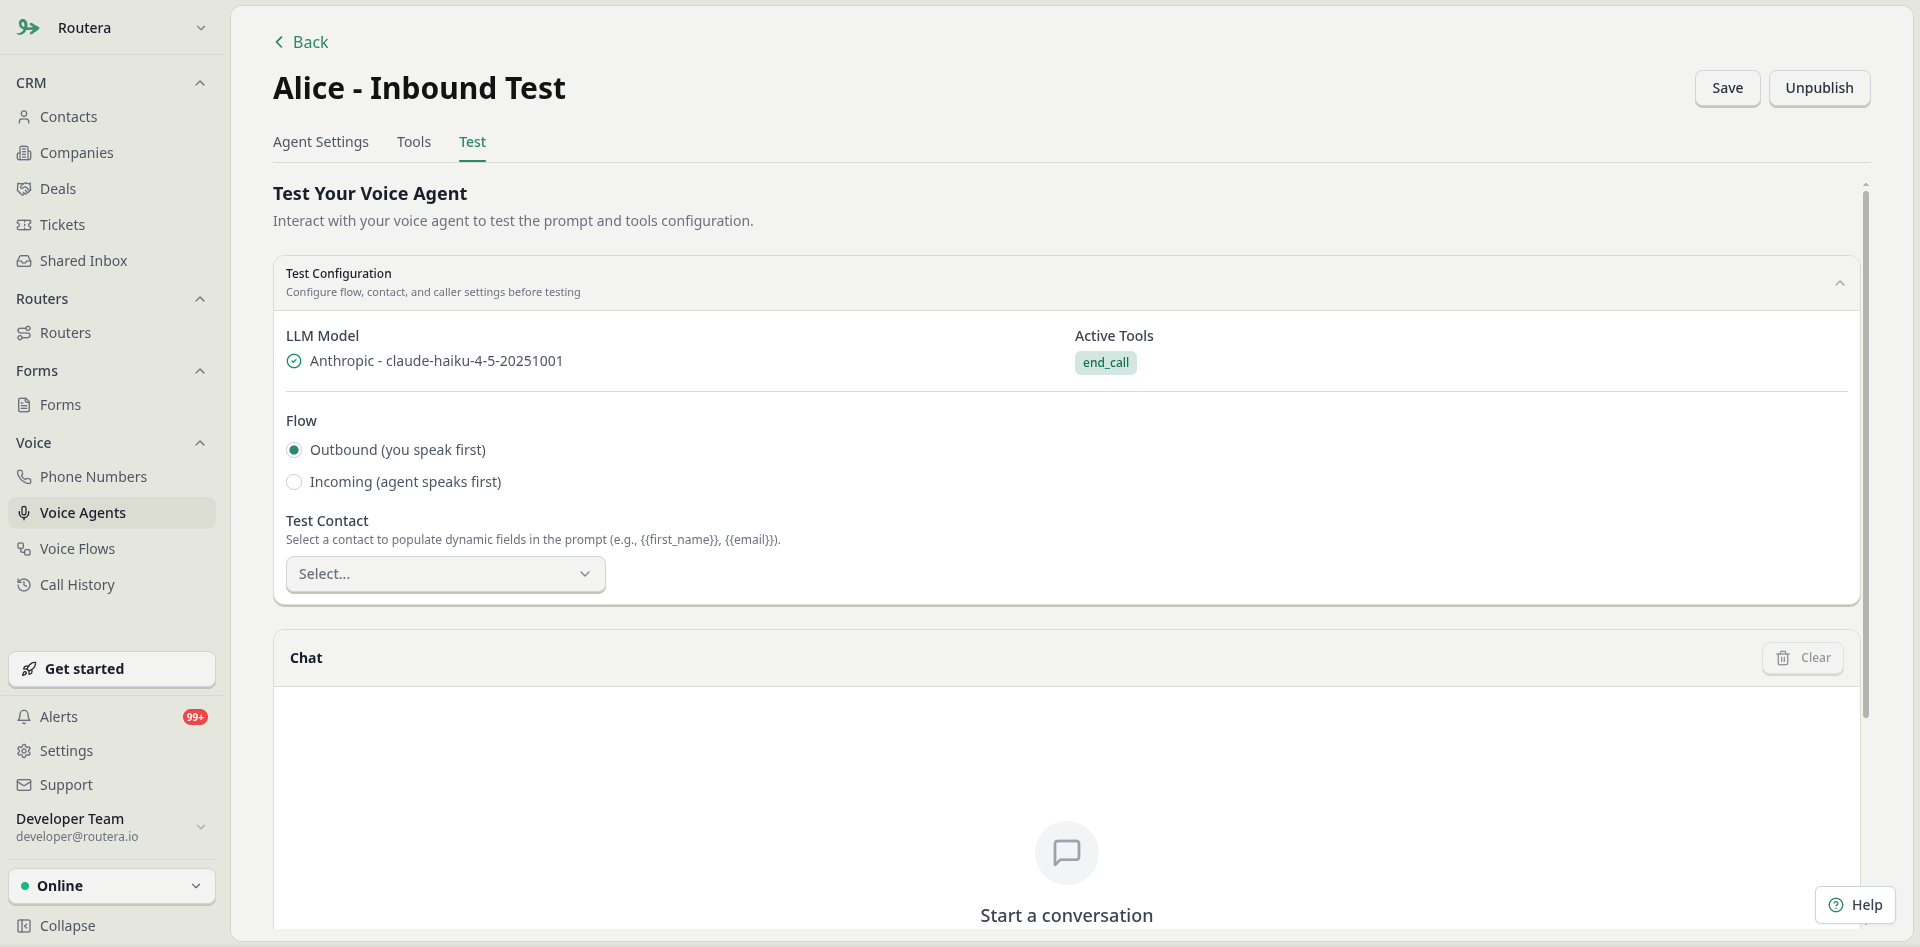
Use the Test tab to chat with the agent using your current global prompt, tools, and LLM settings:- Optionally look up or select a contact so
{{field}}tokens resolve to real values. - Send messages and confirm tone, tool behavior, and field context before going live.
Go live
- Save, then Publish the voice agent.
- Attach the agent to a phone number so inbound and outbound calls use it.