
You need permission to update Billing in your role. If you do not see these options, ask a workspace admin.
Choose a plan
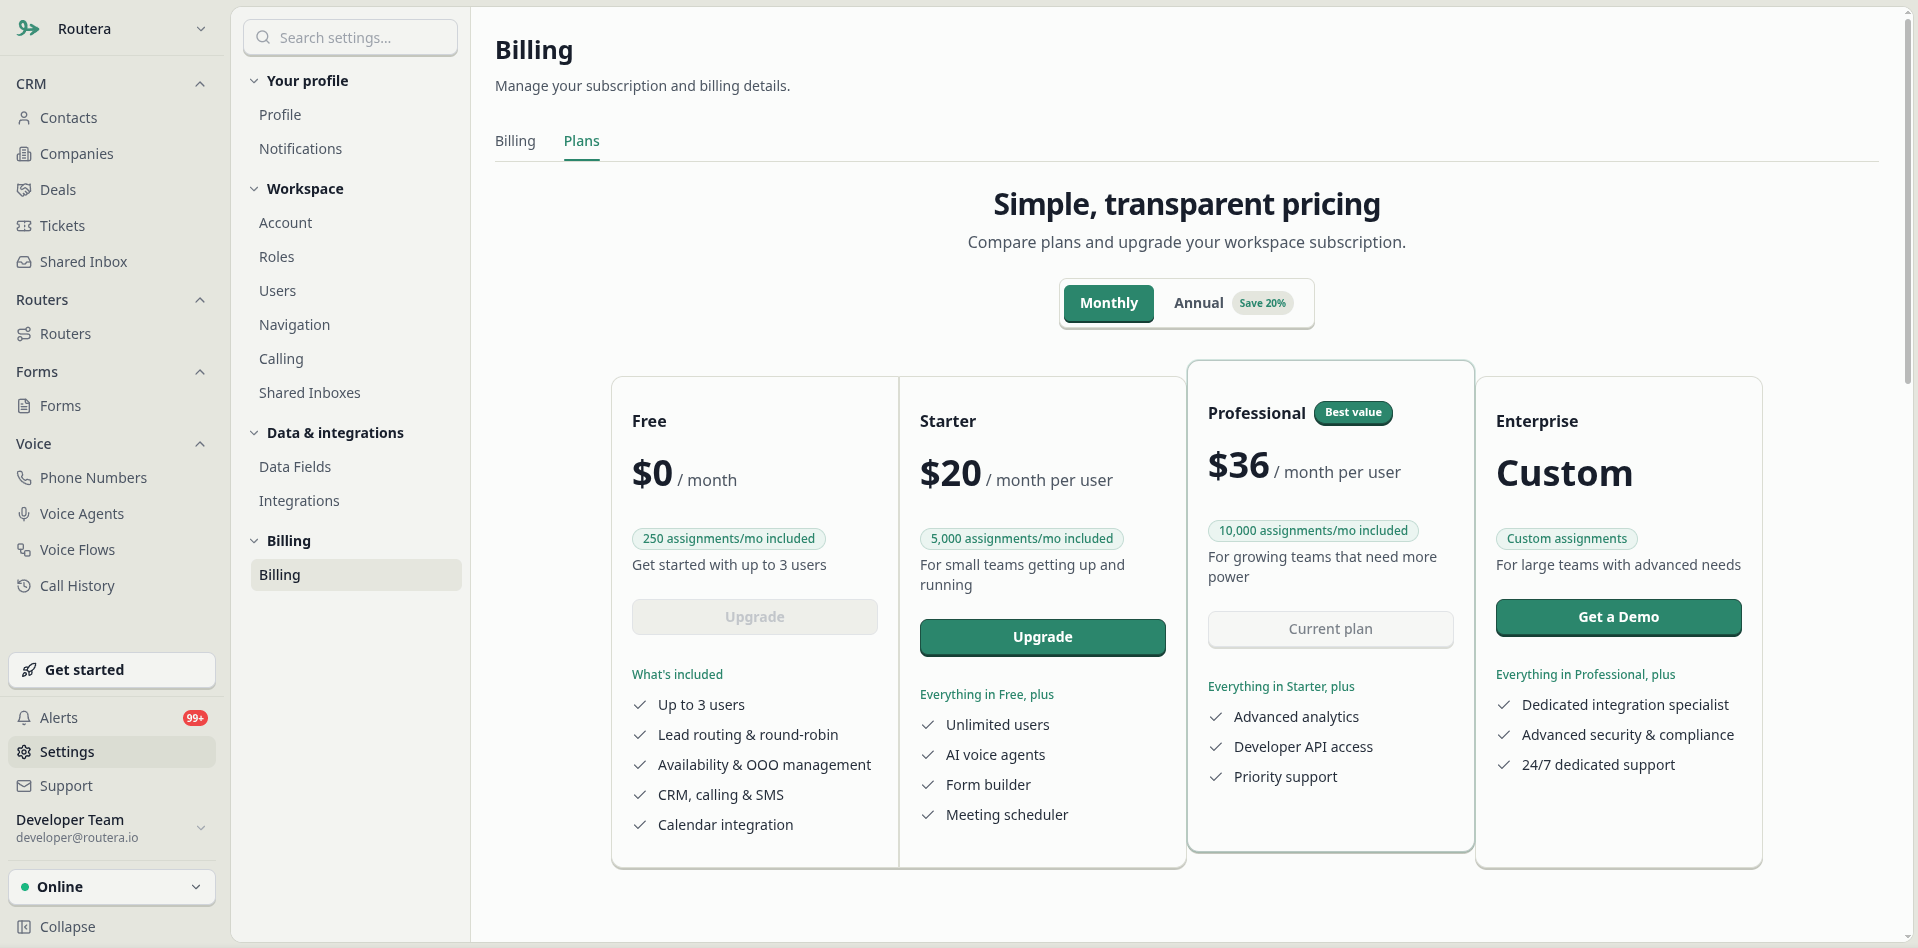
- Open Settings → Billing.
- Open the Plans tab (or click Upgrade now on the Billing tab when you are on a free or trial plan).
- Switch between Monthly billing and Annual billing (Save 30% on annual).
- Compare plan cards (assignments per month, routers, records).
- On the plan you want, click Upgrade (your current plan shows Current plan and cannot be selected again).
- In the Update Plan dialog, review Current Plan, New Plan, seat count, and Total Amount.
- Click Confirm & Update Plan.
Add or change payment method
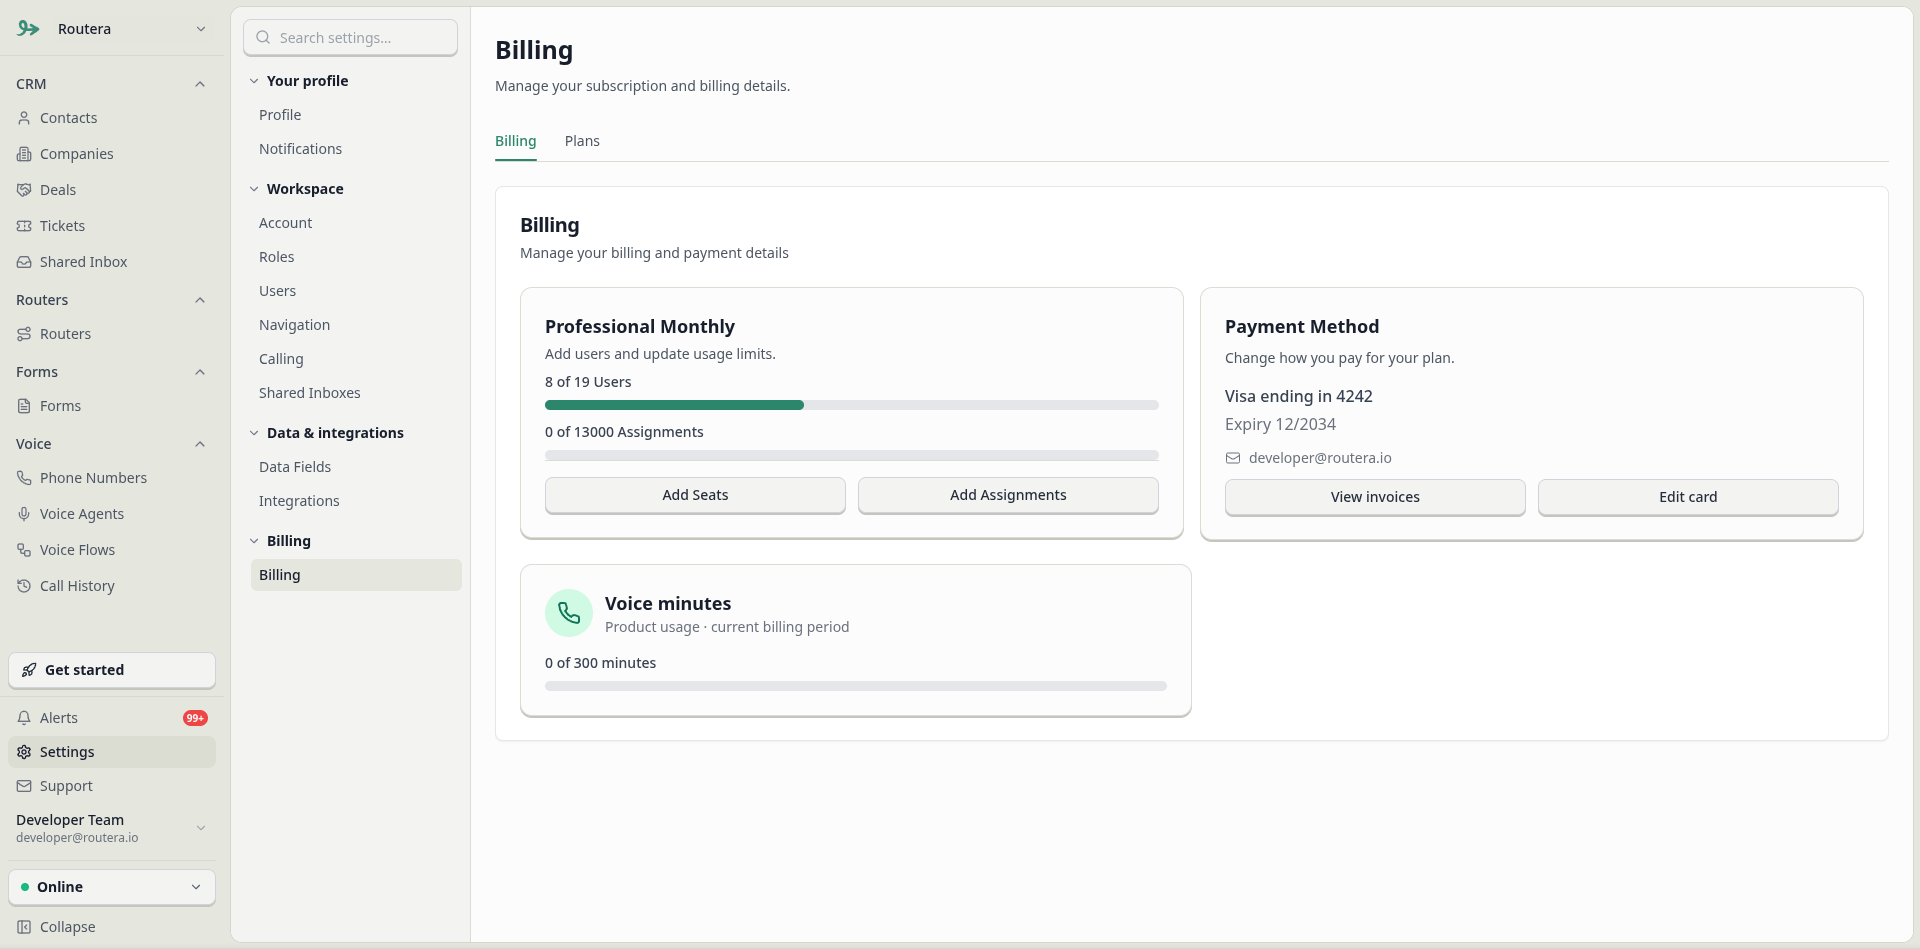
On the Billing tab, use the Payment Method card:
Both Add Payment Method and Edit Card open Stripe Checkout in setup mode. Enter your details there (card or bank, depending on what Stripe offers for your region), then complete checkout. You are returned to Settings → Billing and the card appears as brand, last four digits, expiry, and billing email.
Usage and add-ons
On the Billing tab you can also see:- Users and Assignments usage versus your plan limits.
- Options to add seats or assignment capacity when you are near a limit (charges apply per your subscription).